
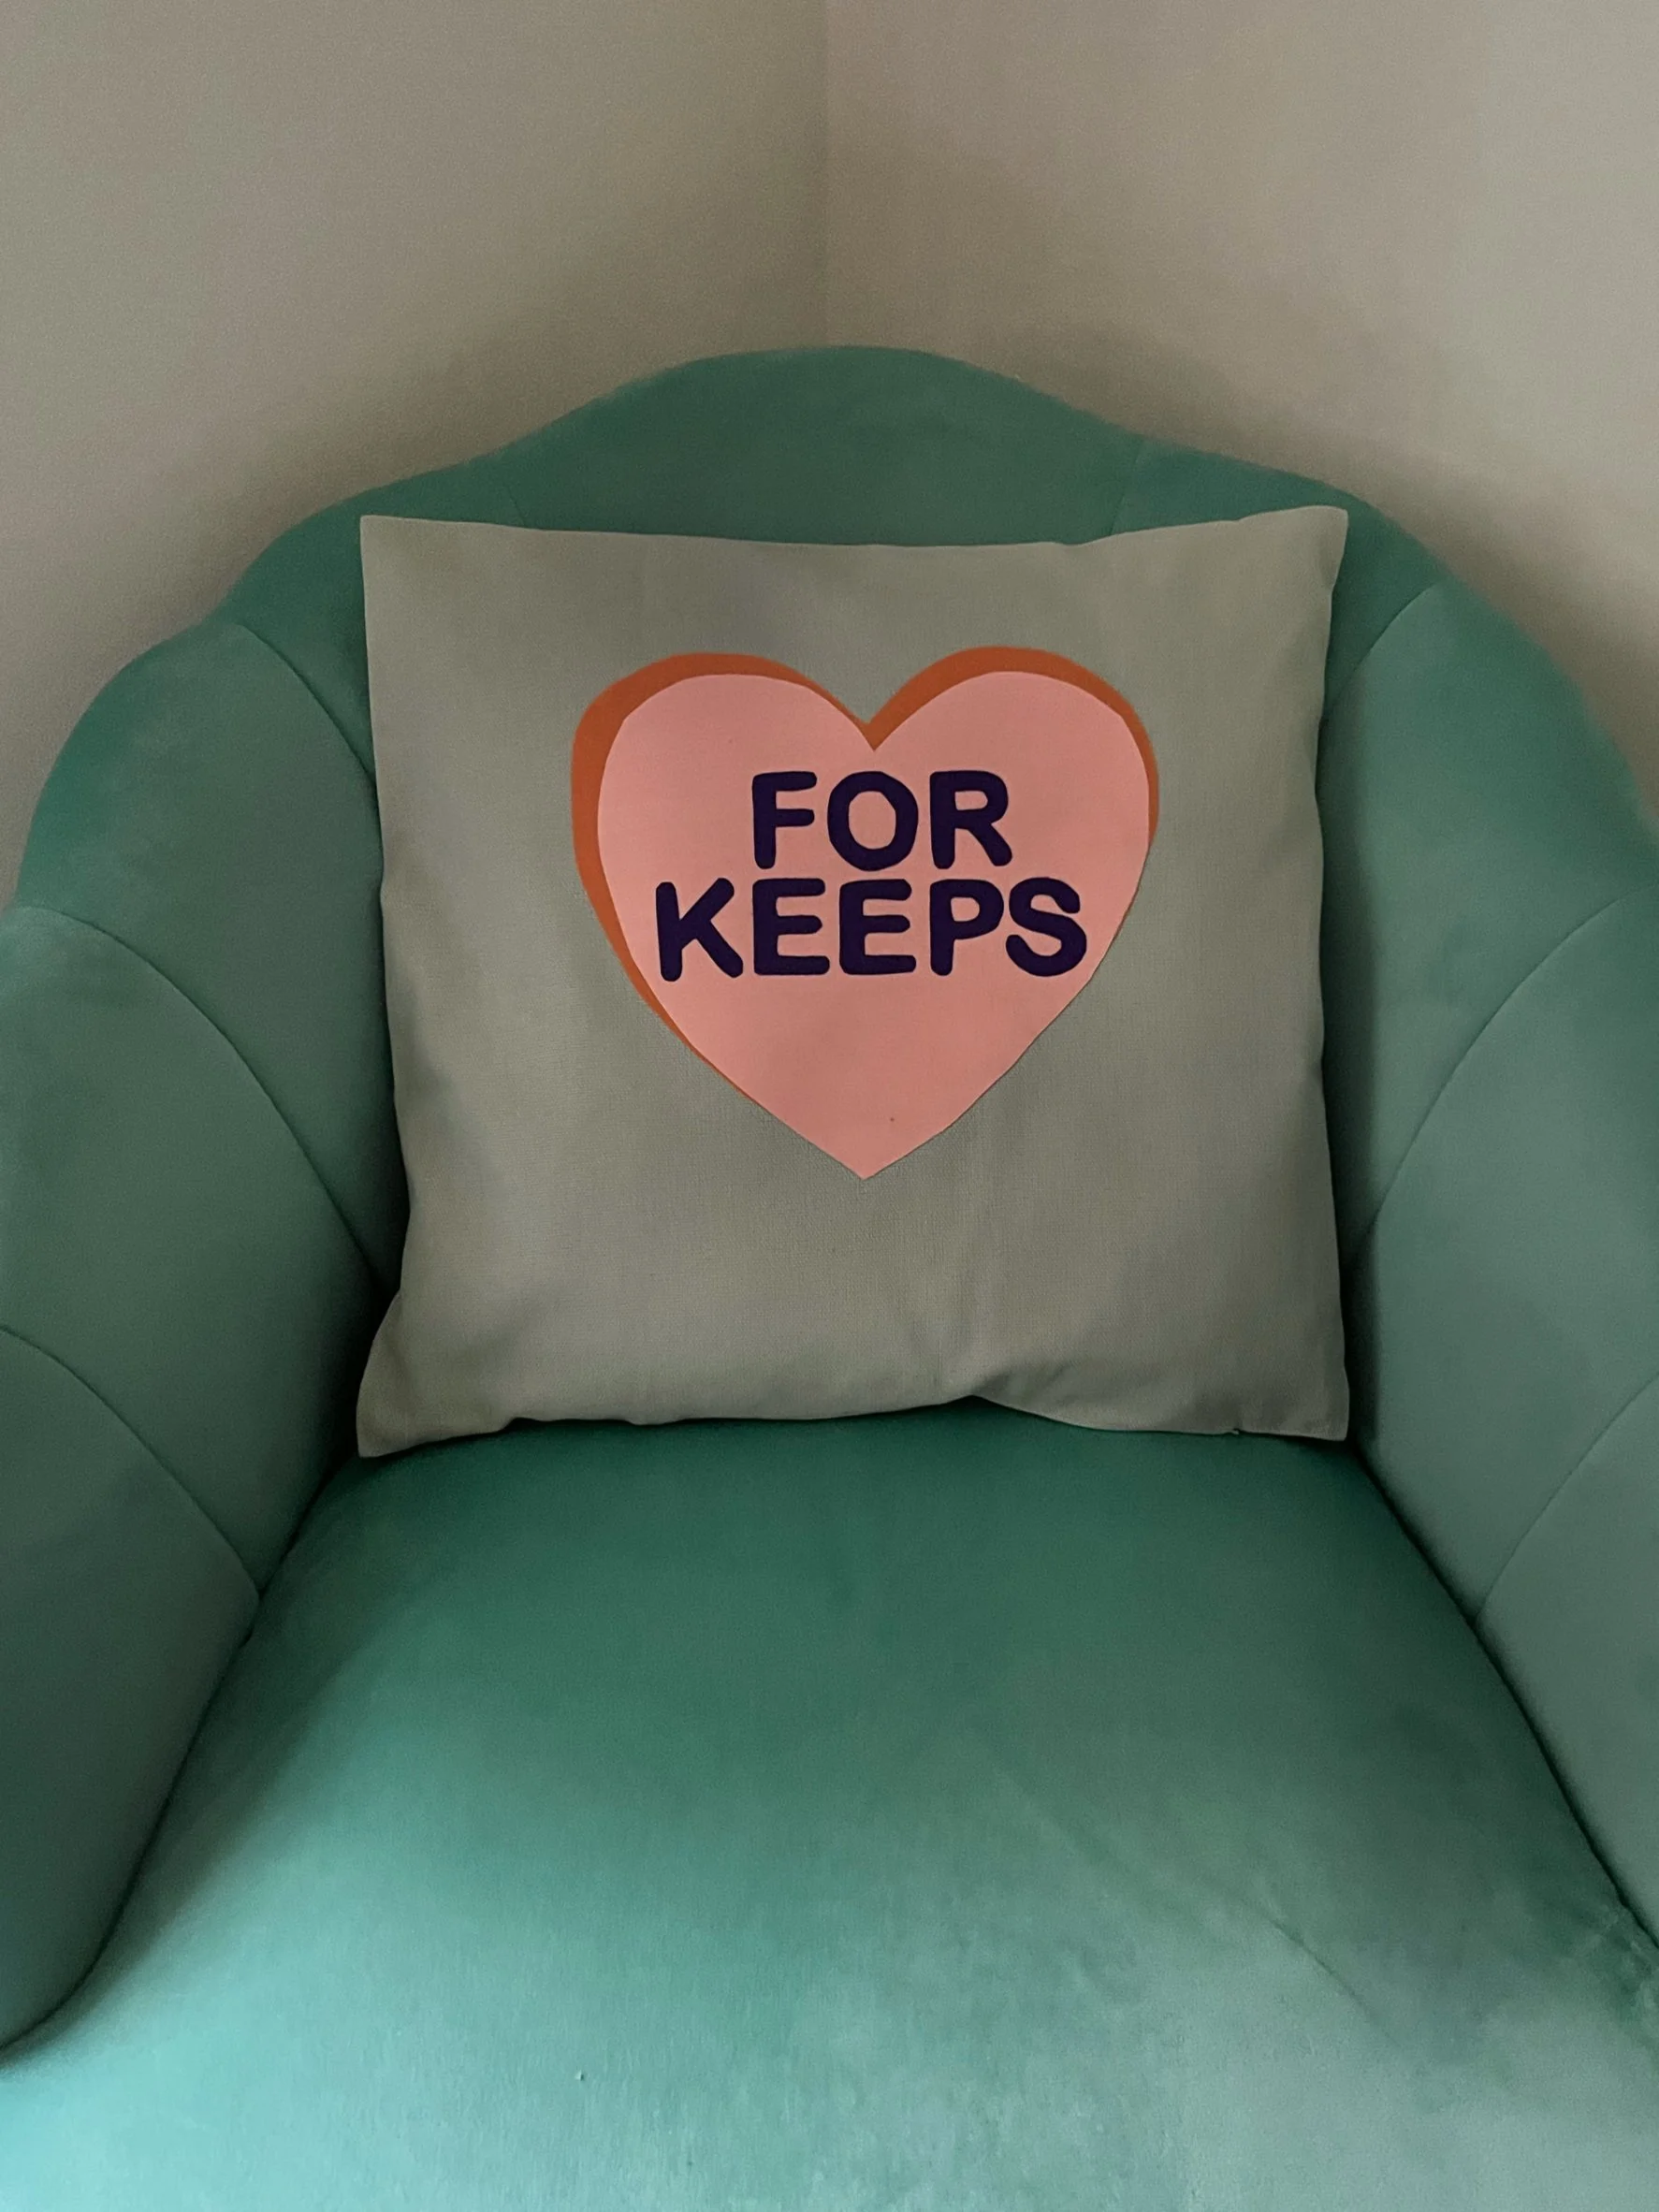
Love Hearts Cushion Cover Kit
I hope you enjoy putting together this super easy cushion cover kit as much as I enjoyed creating it!
Cushion Insert
If you have a cushion insert included in your kit, I was amazed when they arrived how they turn into fluffy cushions with them coming flat-packed, it’s like magic! Please see the instructions below to bring your cushion to life:
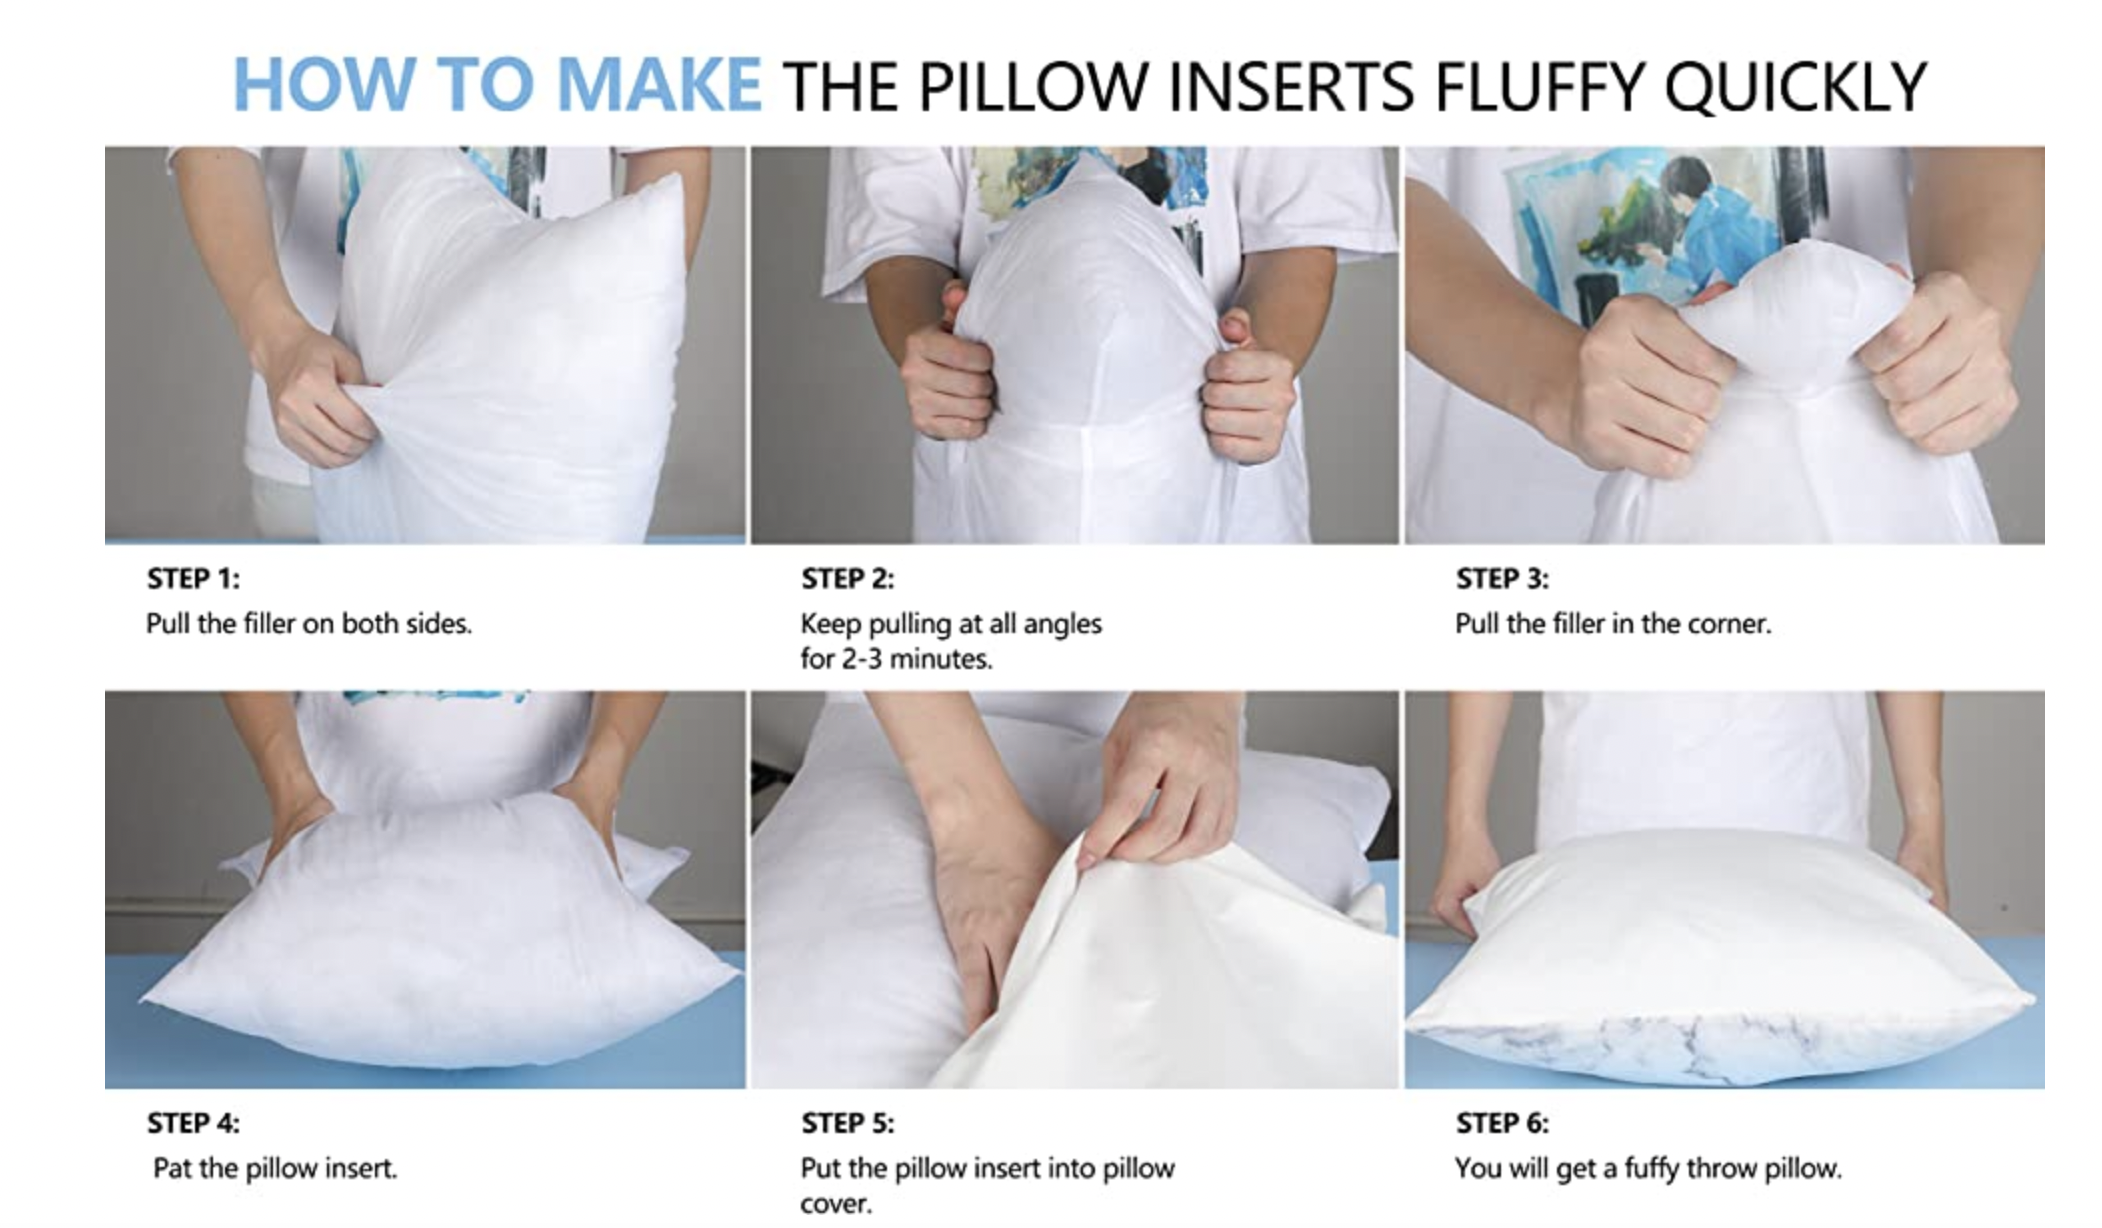
Photo Instructions
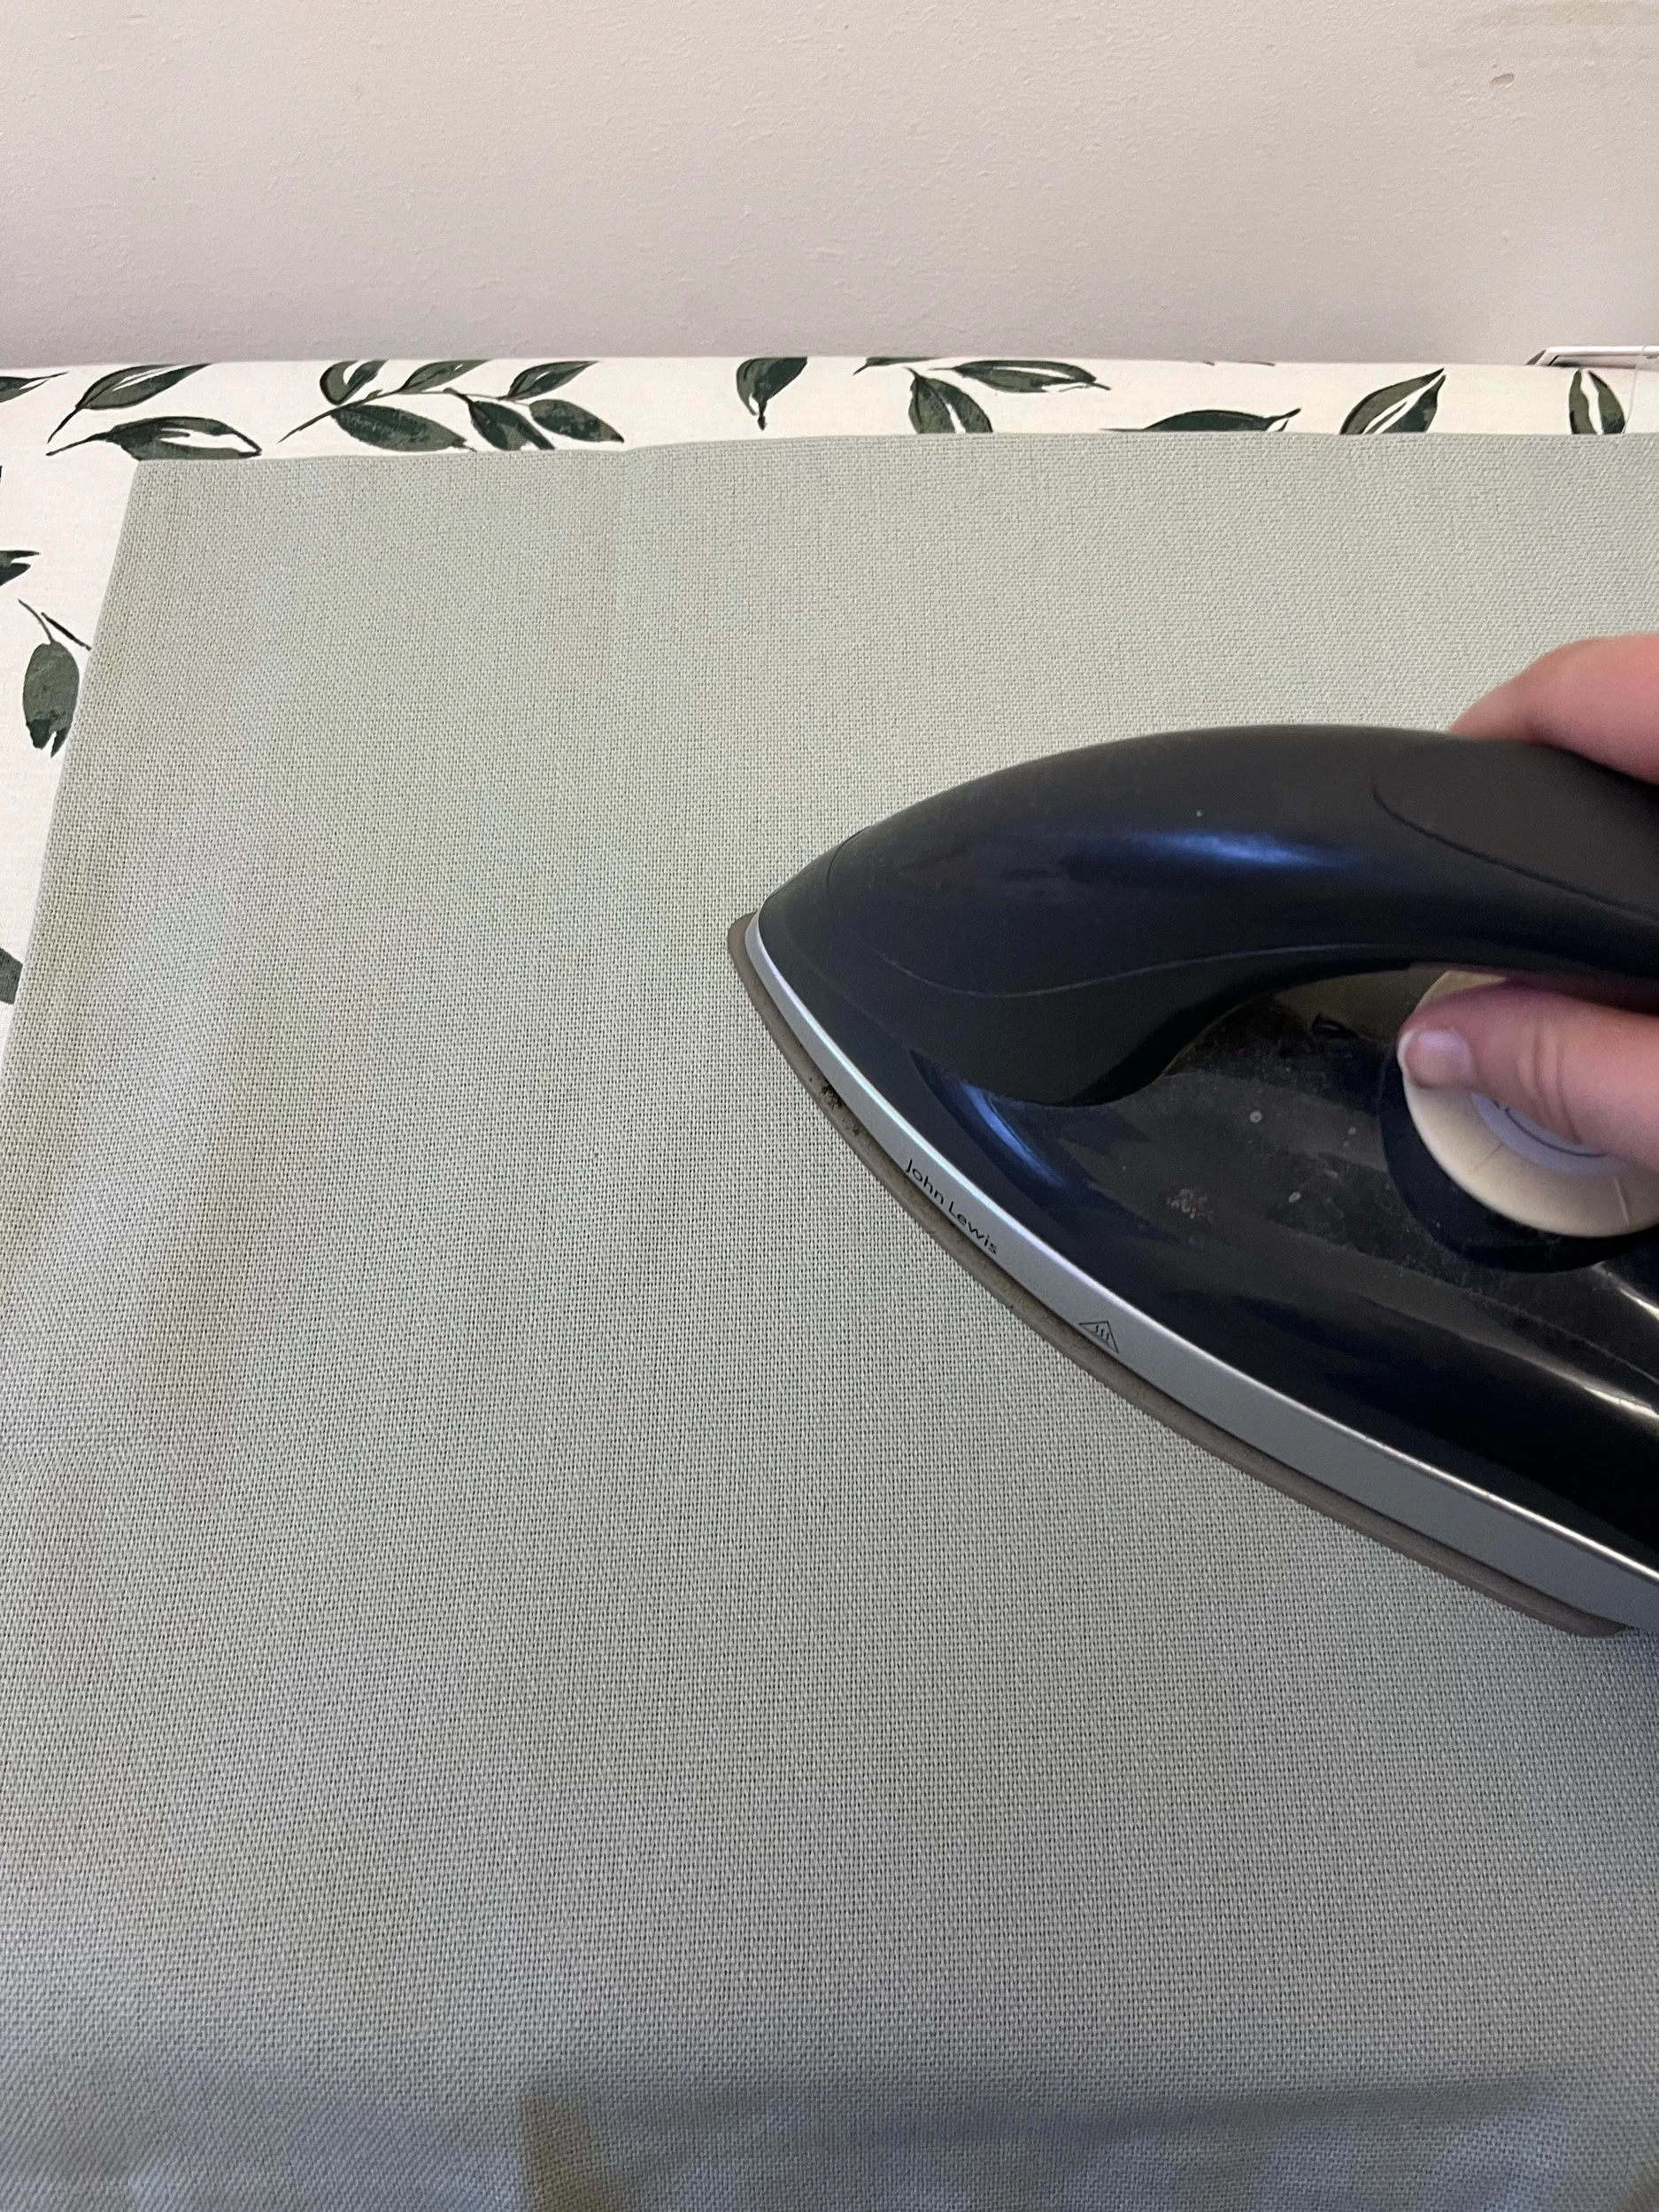
1. Start by taking out your cushion cover and ironing all over. Use a medium setting on your iron and you can always take it higher if necessary.
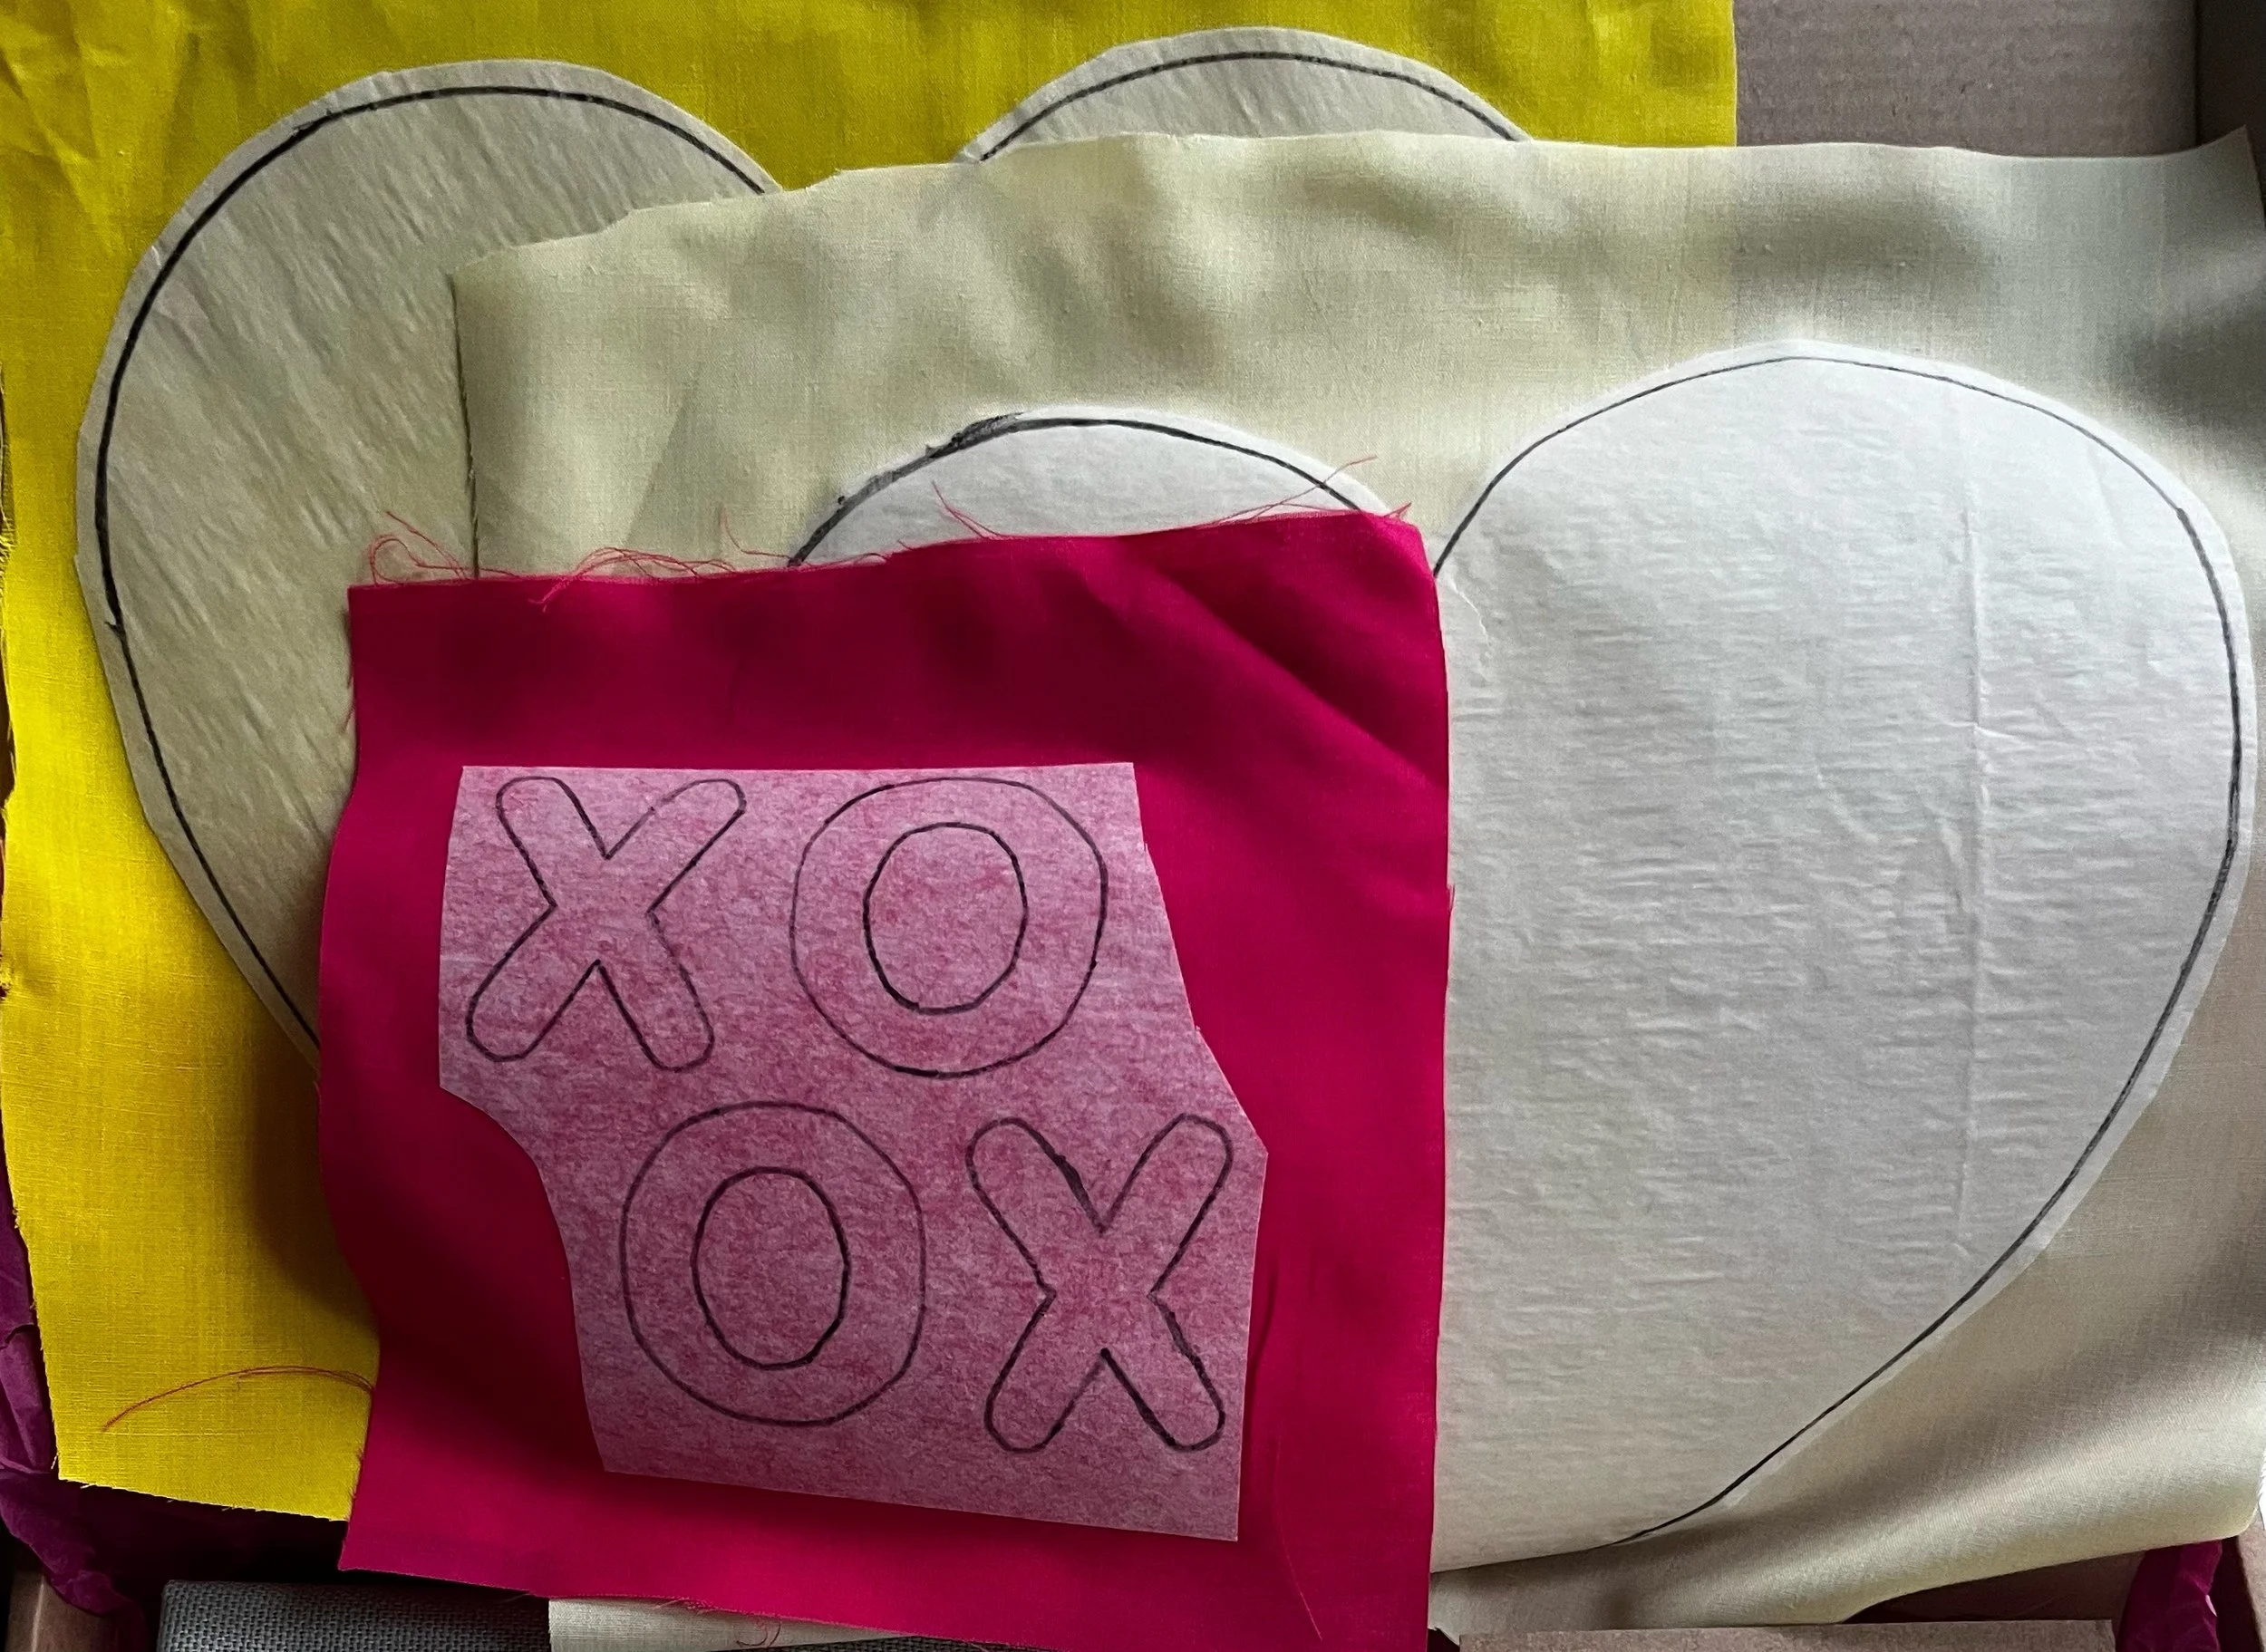
2. Carefully follow the pen lines and cut out each of your stencils so that you are left with two cut-out hearts and each letter from the phrase you want to use. We are going to use the backing paper that is attached so please don't remove this yet!
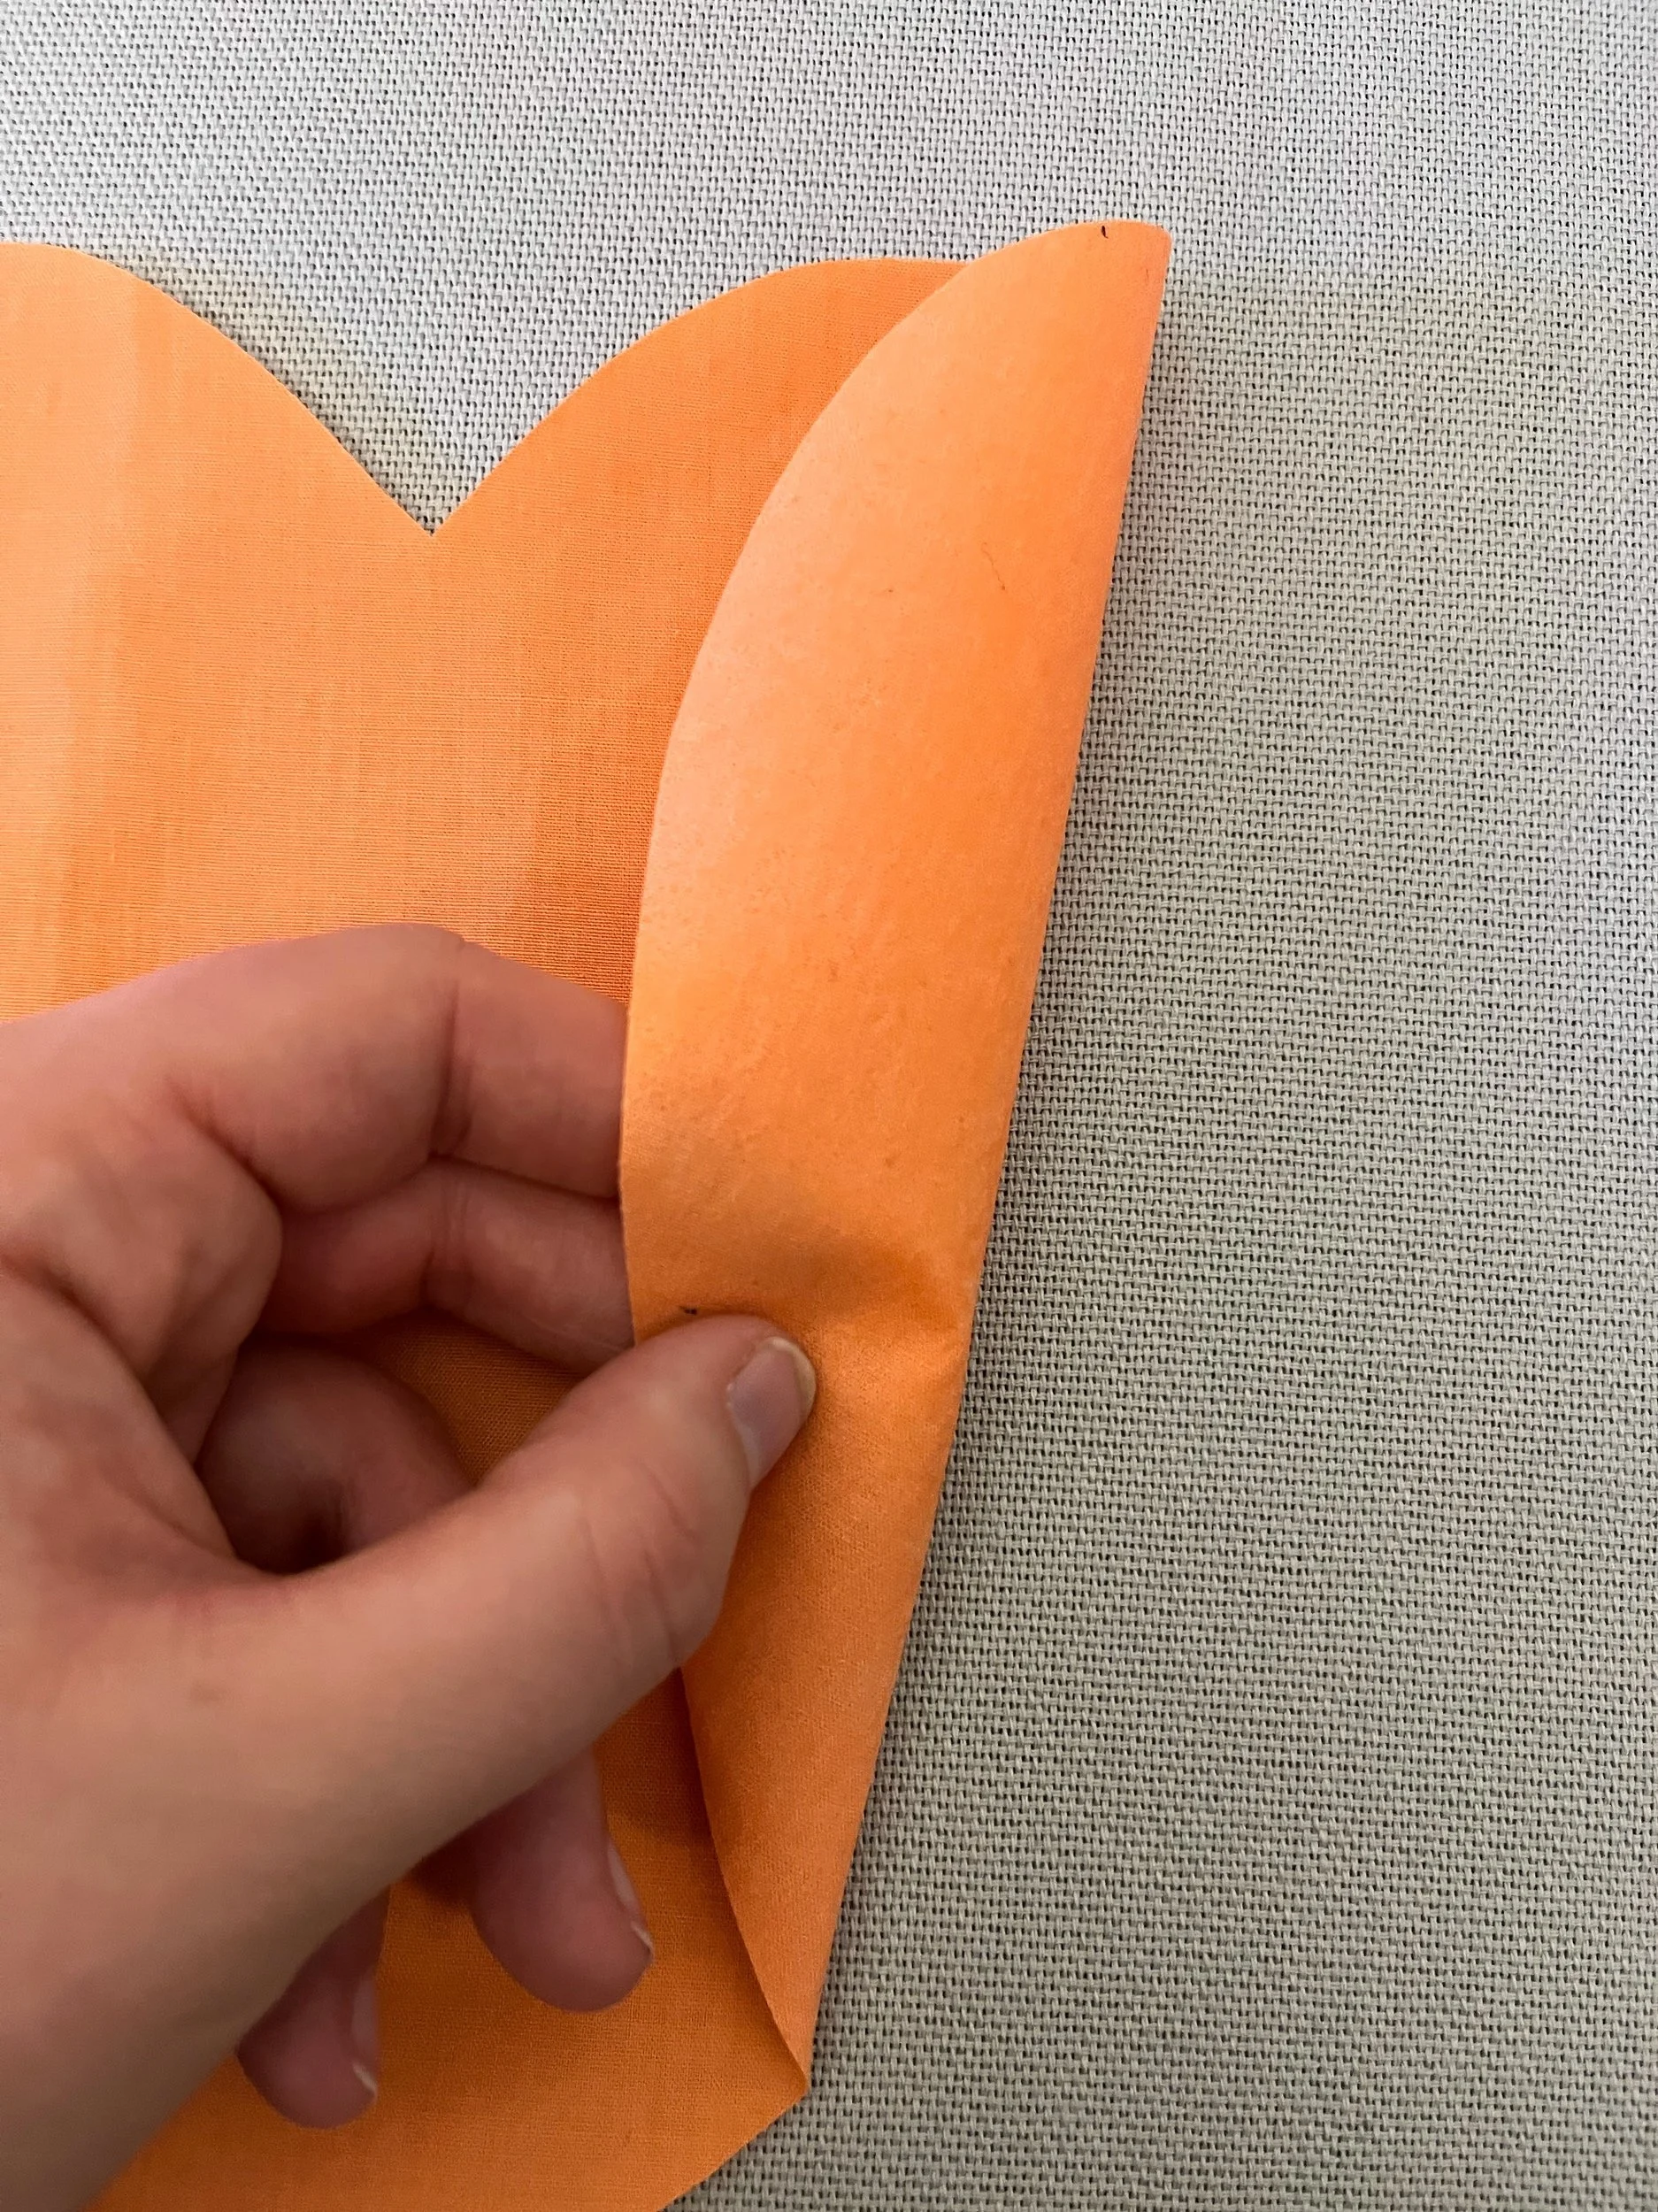
3. Taking your largest heart (should be a darker shade of your chosen colour) peel the paper from the back, it feels a bit like tracing paper and leaves a 'shiny glue' on the reverse of the heart. This 'gluey' side should be against the cushion cover and not facing upwards towards the iron or it will stick to your iron!
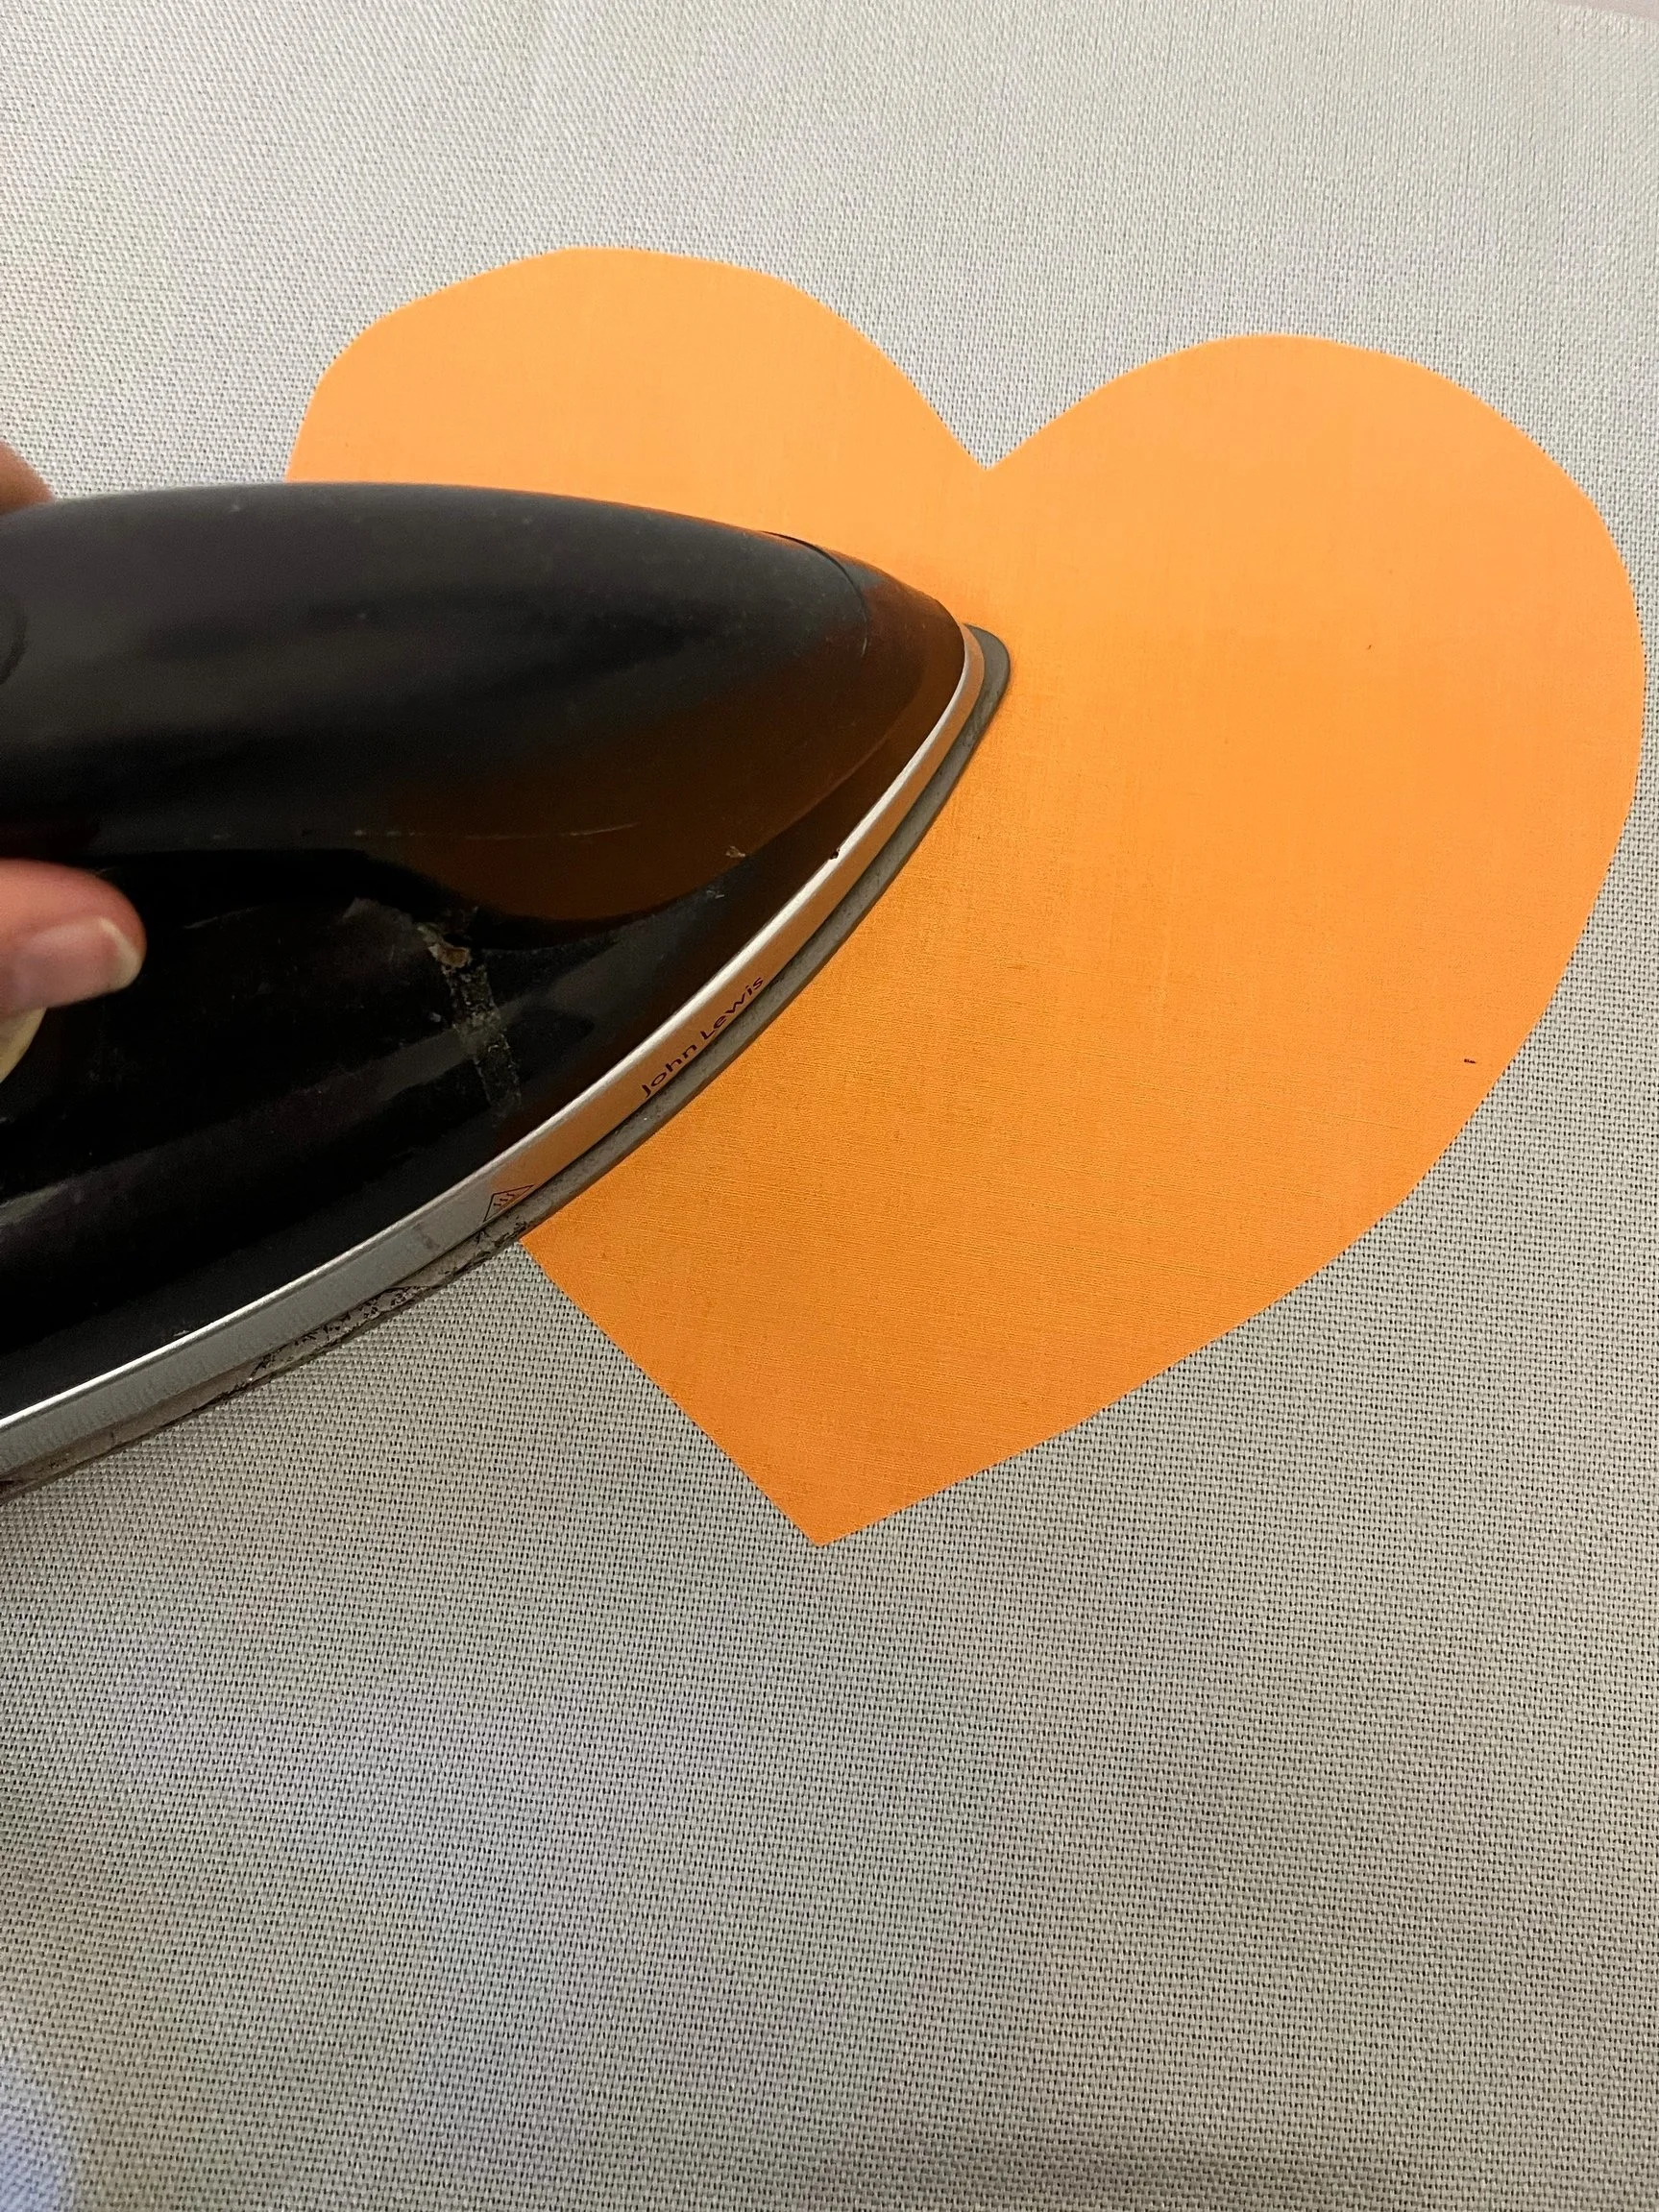
4. Place the heart in the middle of the cushion and centralise where you would like it to appear (remember it will be 3D when you've put the cushion inside!) Check again that the 'shiny gluey' side is against the cushion cover and iron over the top of the heart for a few seconds until it has bonded with the cushion cover. Check the edges as these can sometimes be trickier to 'stick'.

5. Now you want to move onto your smaller, lighter coloured heart and peel off the backing paper.
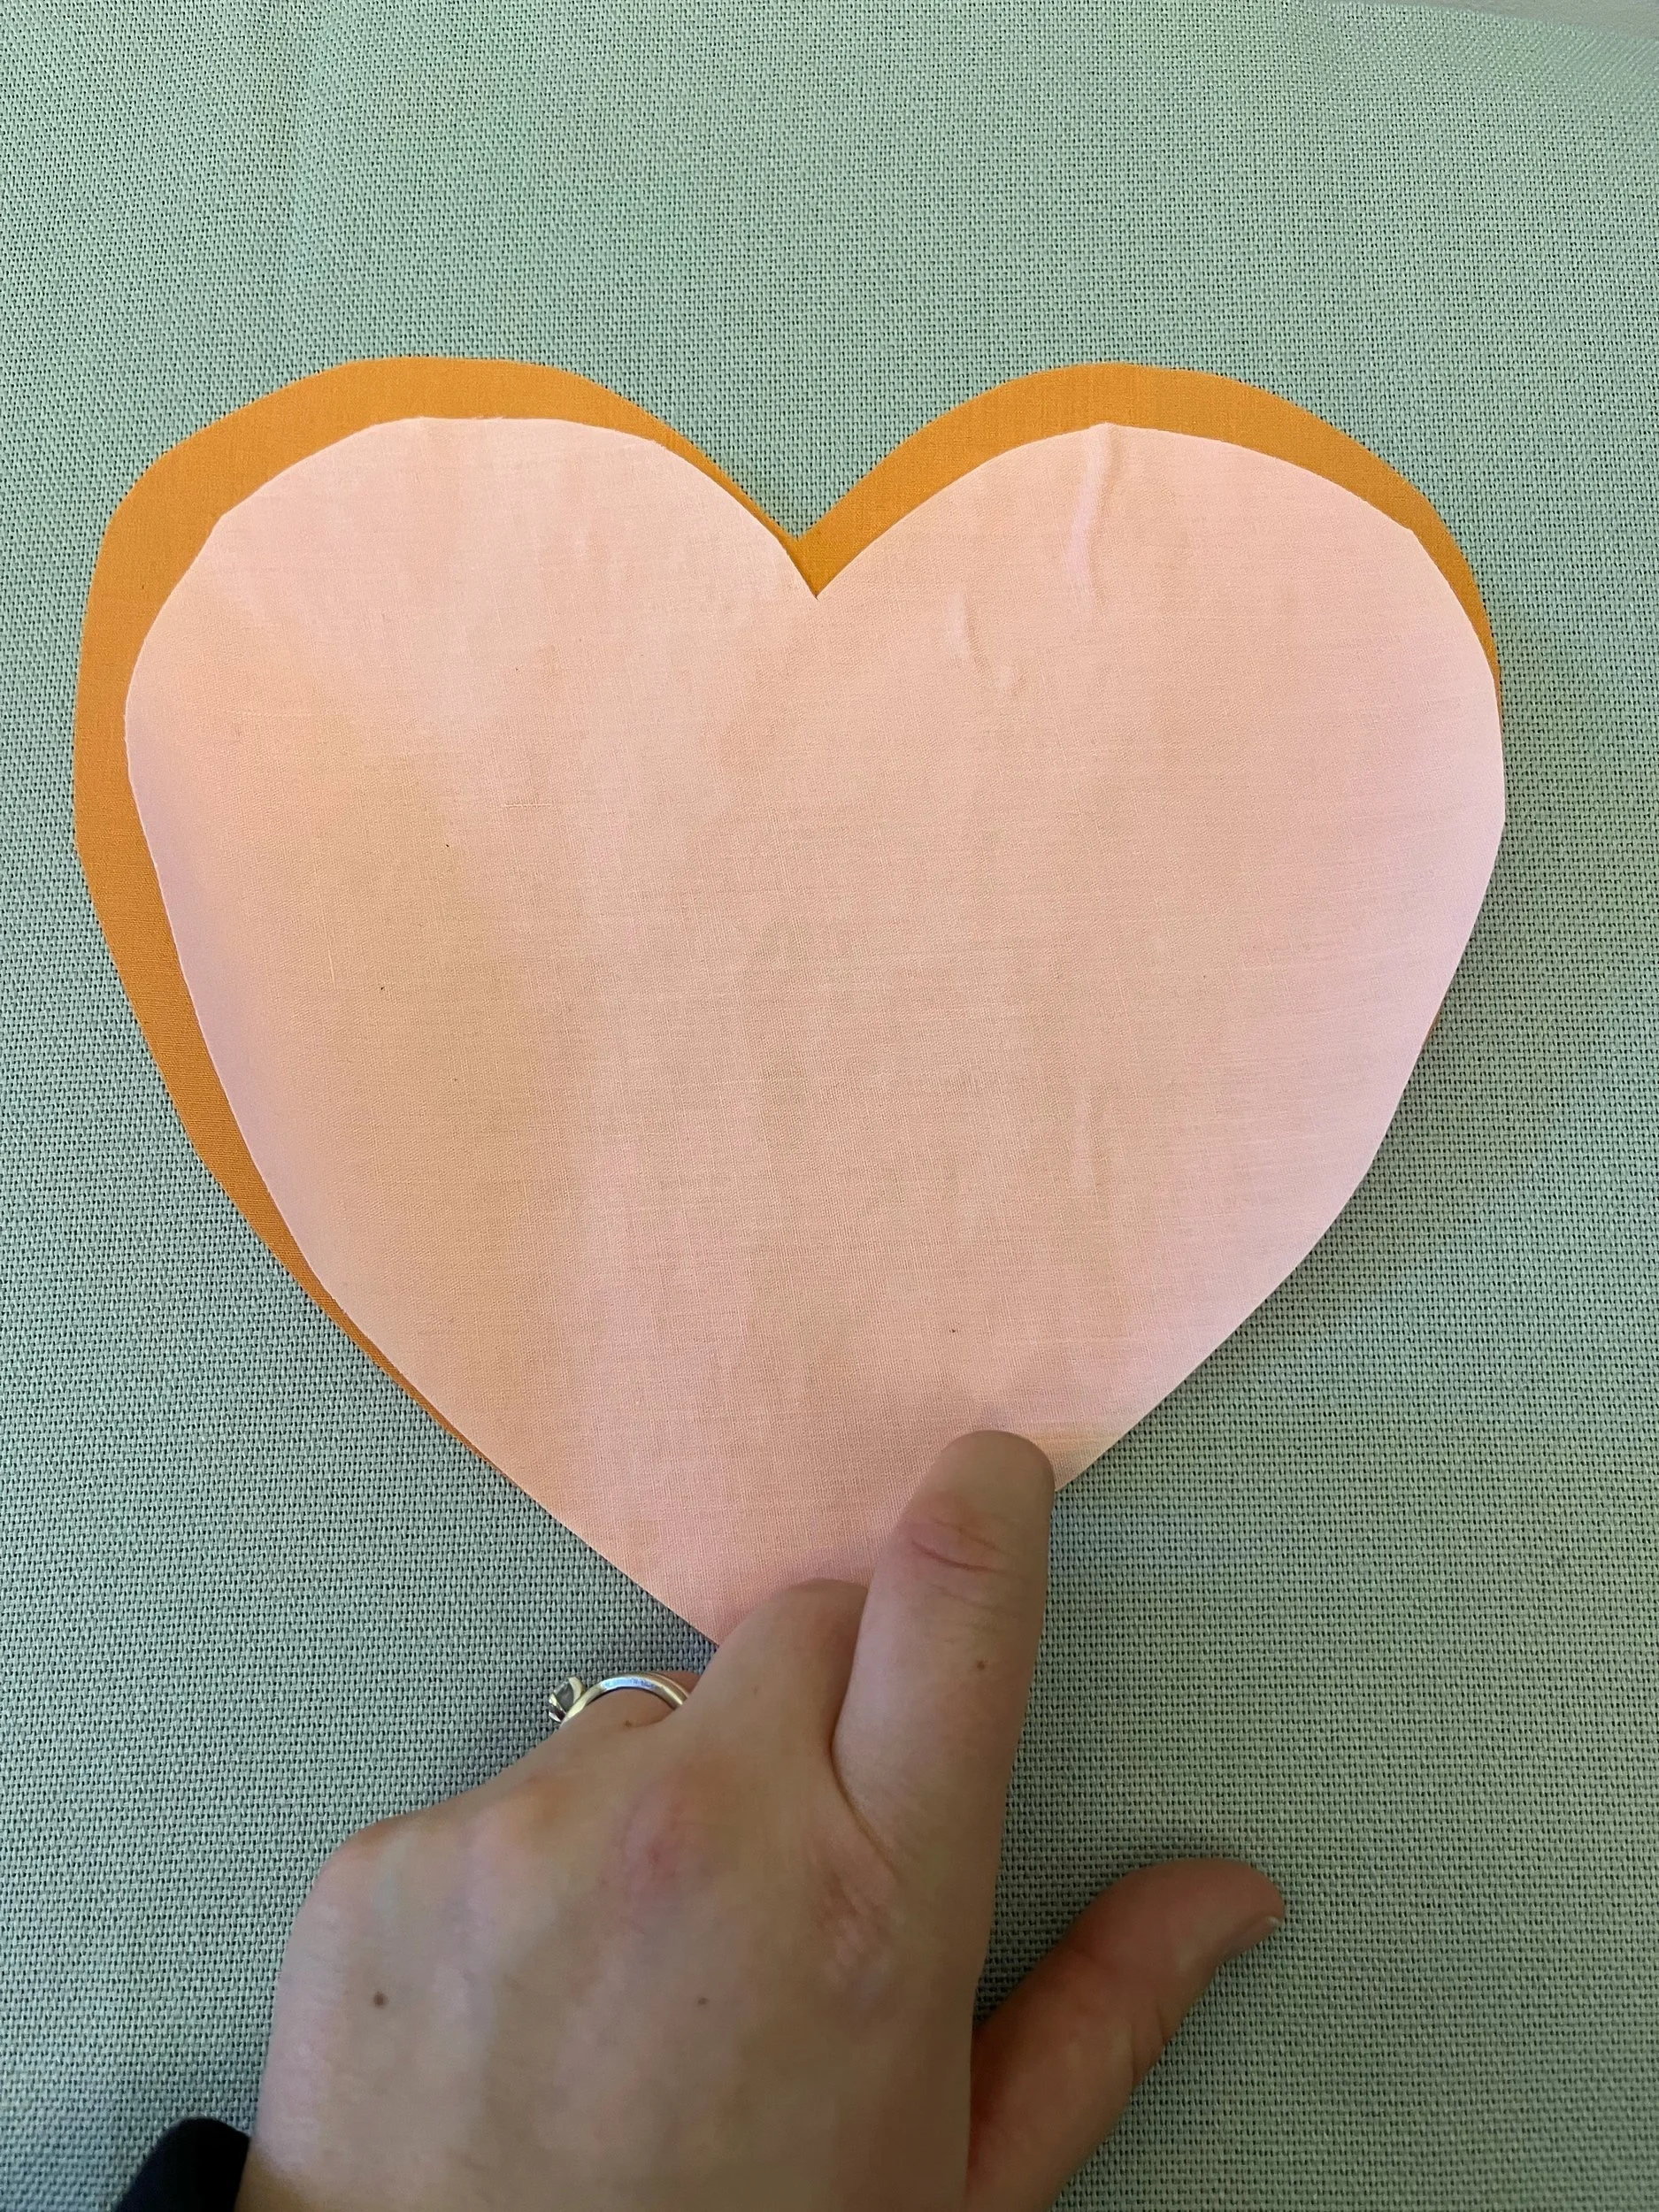
6. Again, make sure that the 'shiny gluey' side is down against the first heart and not facing your iron. Line up the smaller heart so that it leaves a 'shadow' of the larger one behind. The right-hand side of the smaller heart should line up with the larger heart edges on the right.
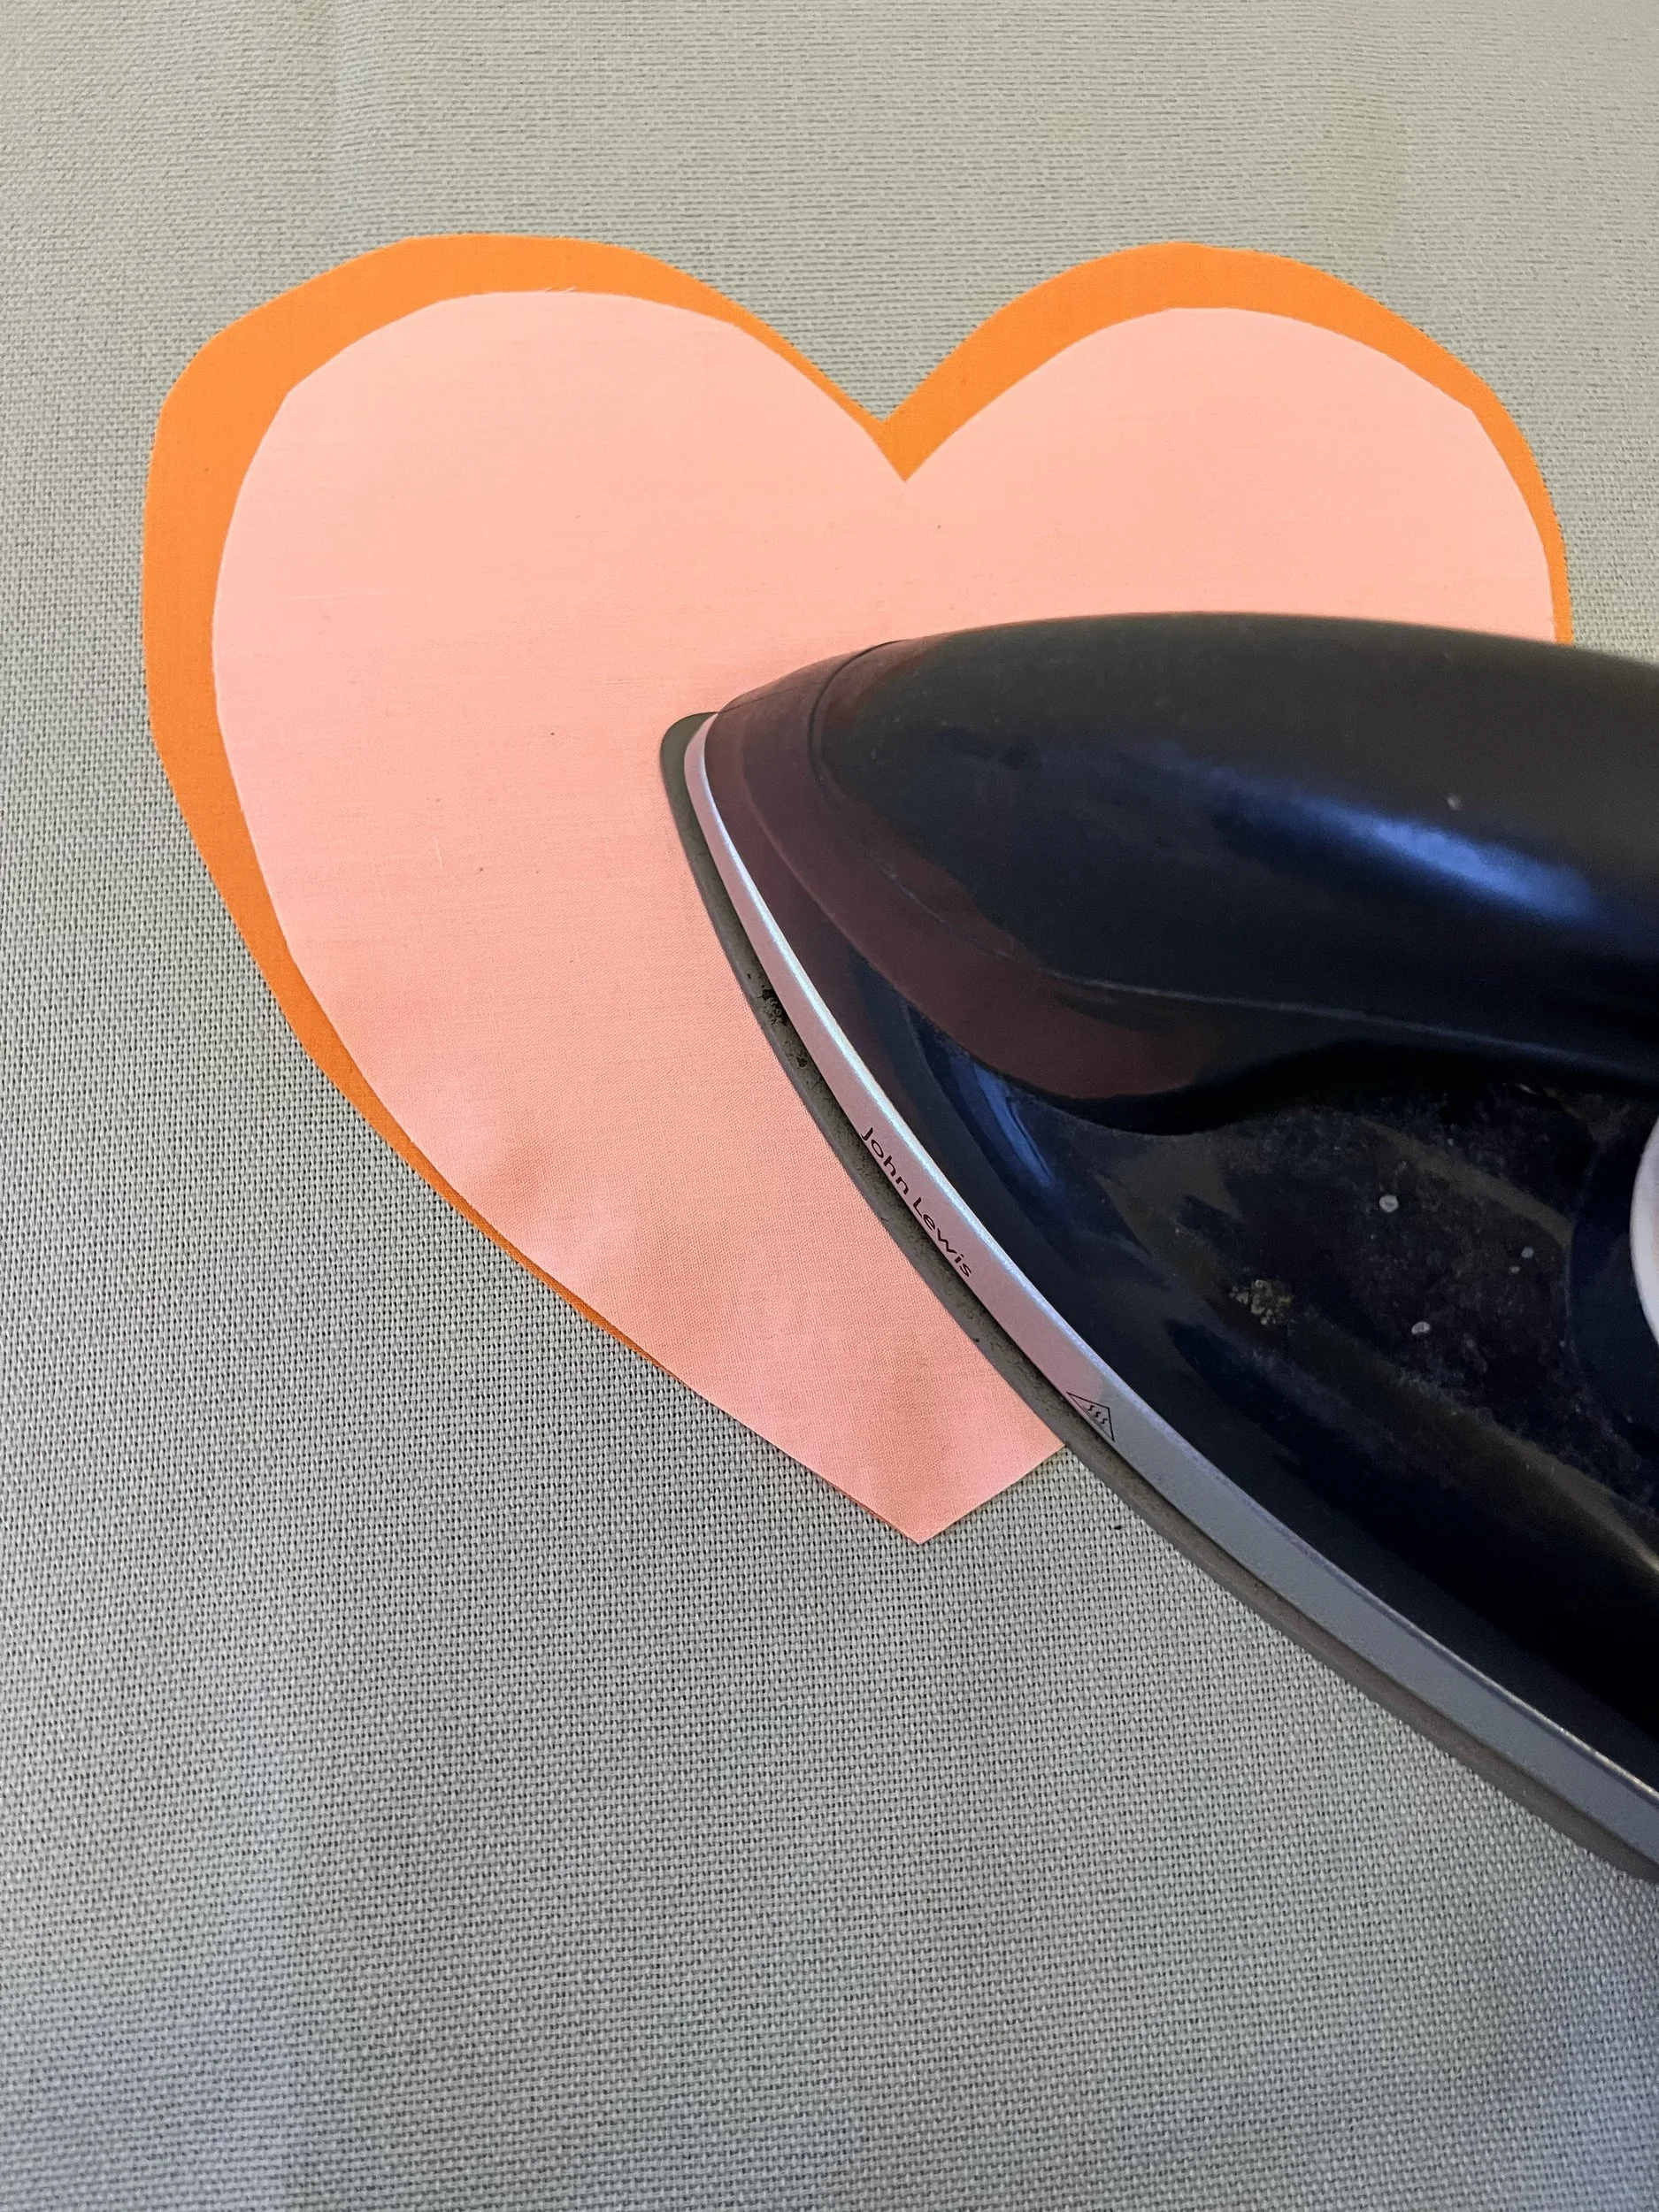
7. Once you are happy with the placement, again iron over the top for a couple of seconds to bond the second, smaller heart to the larger one.

8. Next you want to start peeling the paper from the back of all the letters. Be careful not to remove the 'glue' here and if any does come away just press it down again with the finger. If you're struggling to peel the paper off, try 'crushing' one of the corners to try and release the paper away.
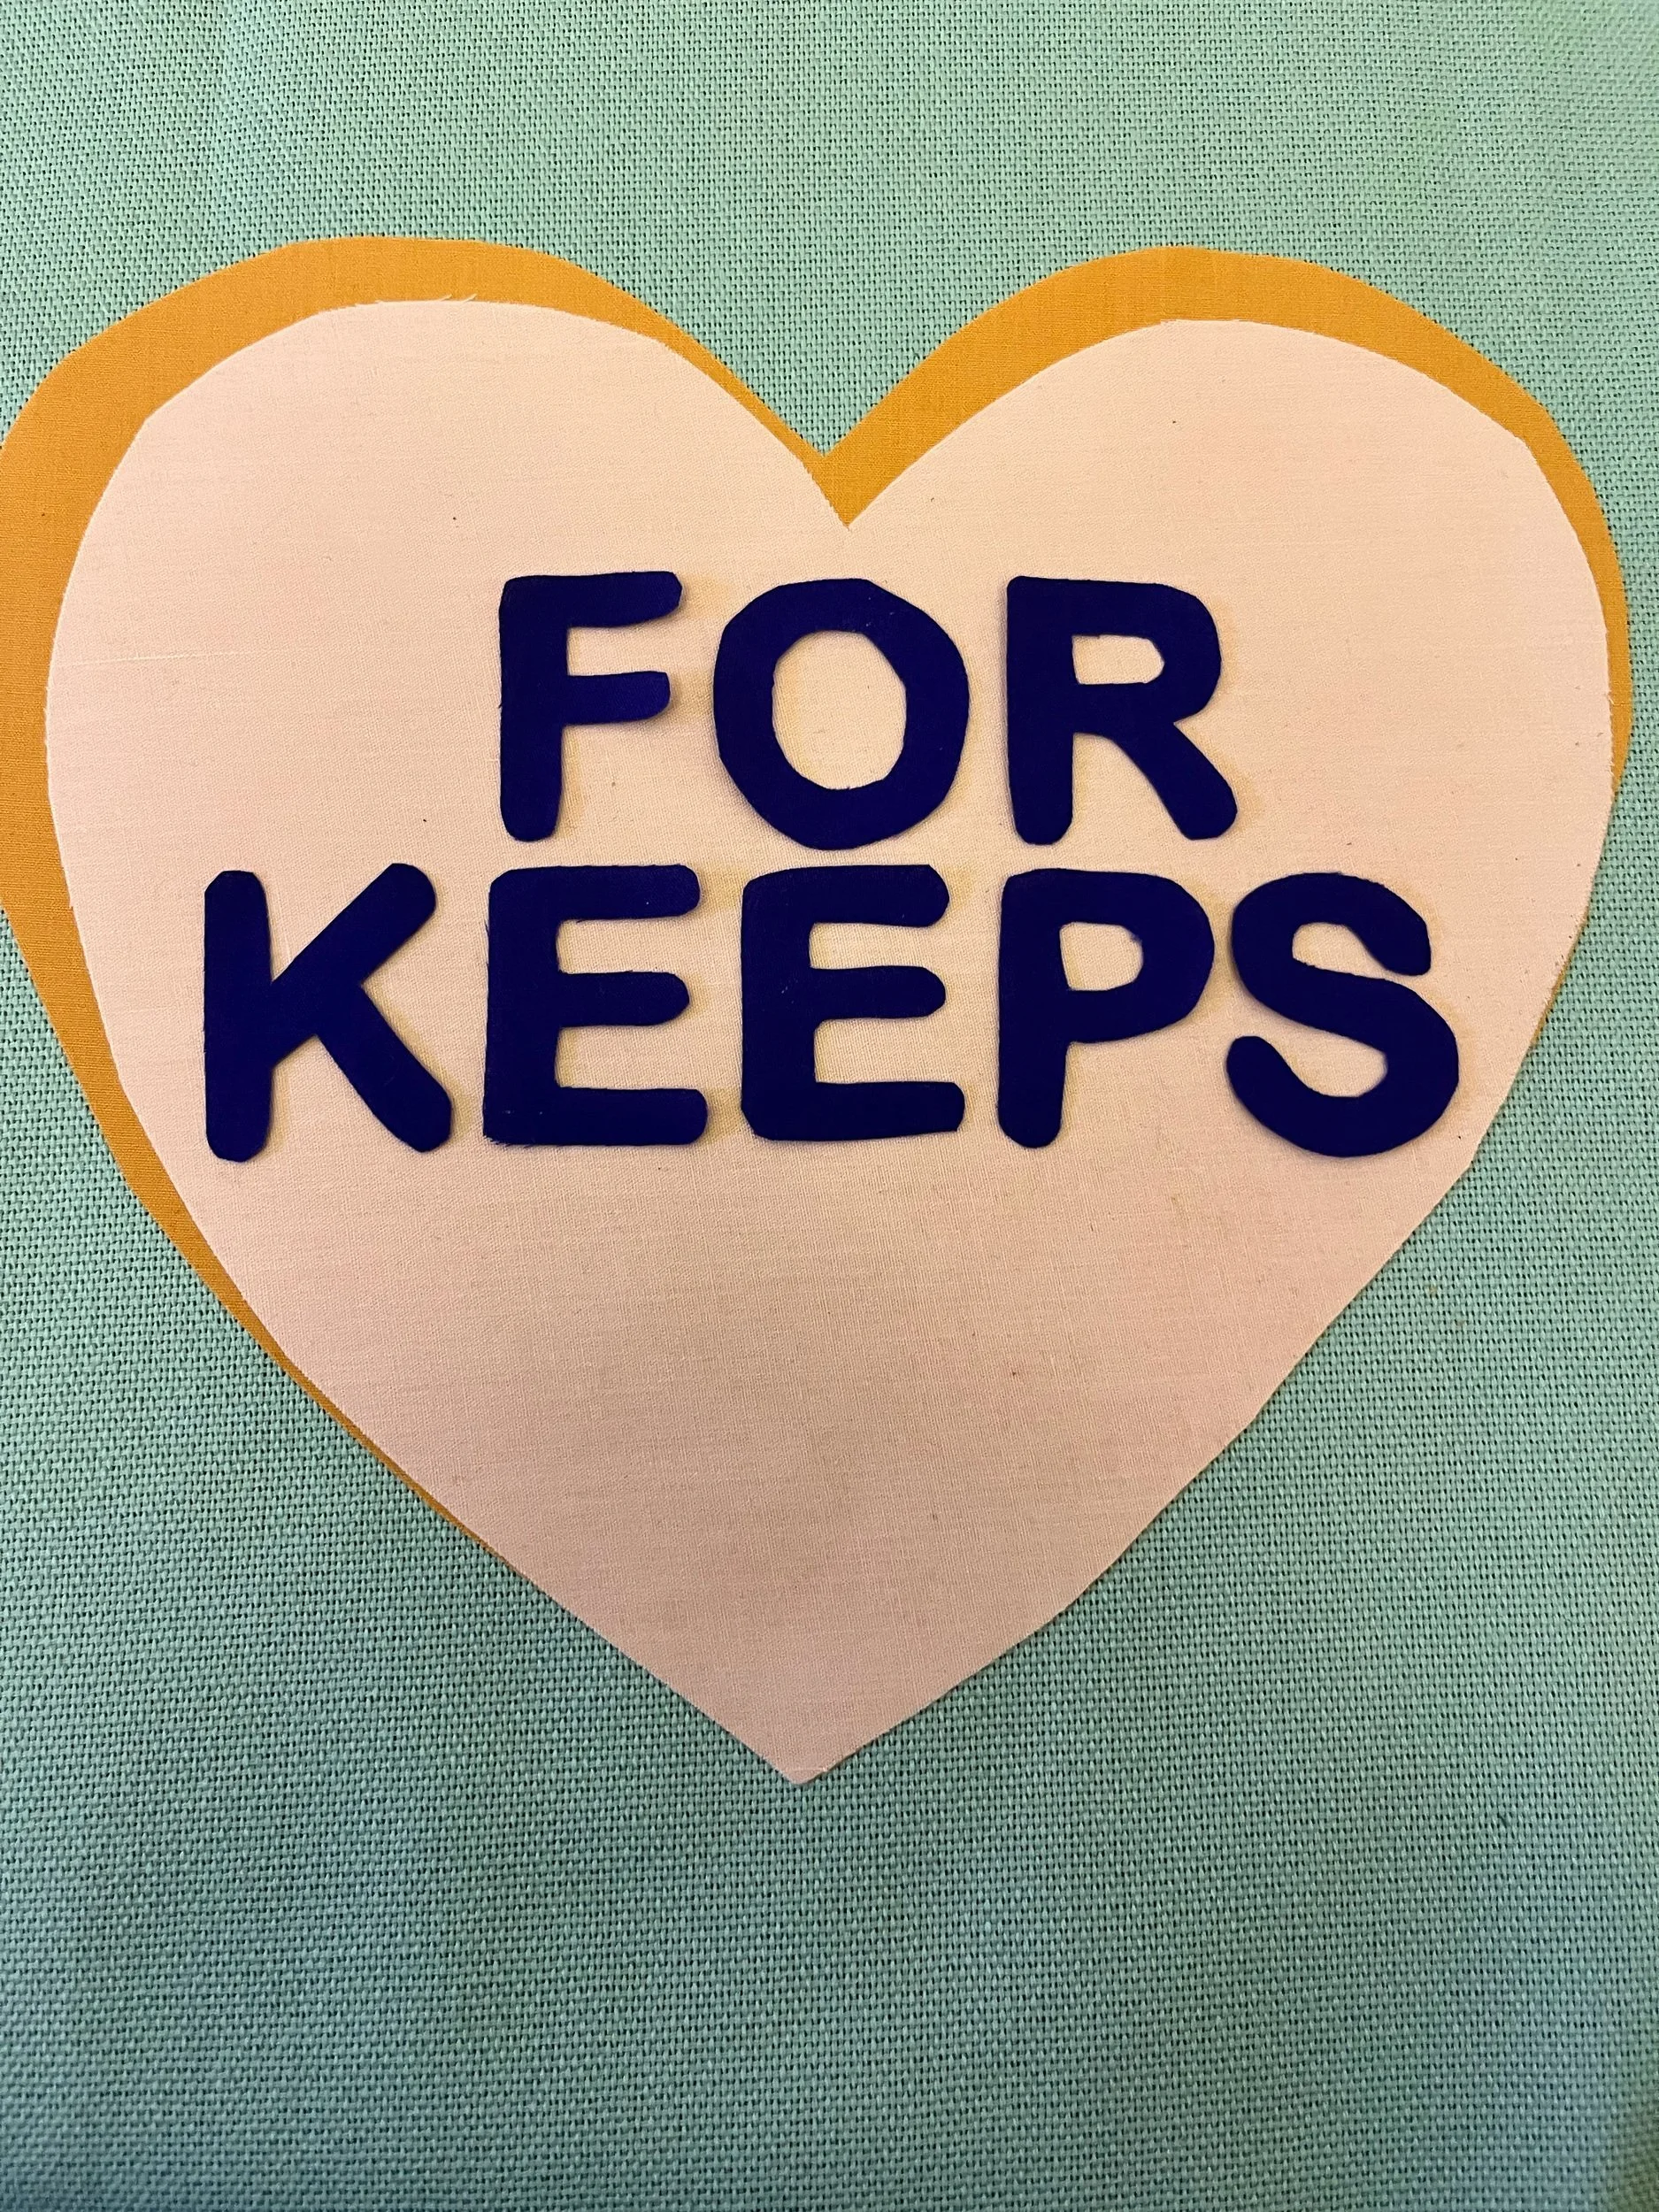
9. Once, you have removed all the paper, it will be easier to tell if the 'shiny gluey' side is down now becuase your text will be facing the right way if it is! Line up each of the letters, paying attention to not going over the edges and keeping even space between each letter so that it fits neatly.
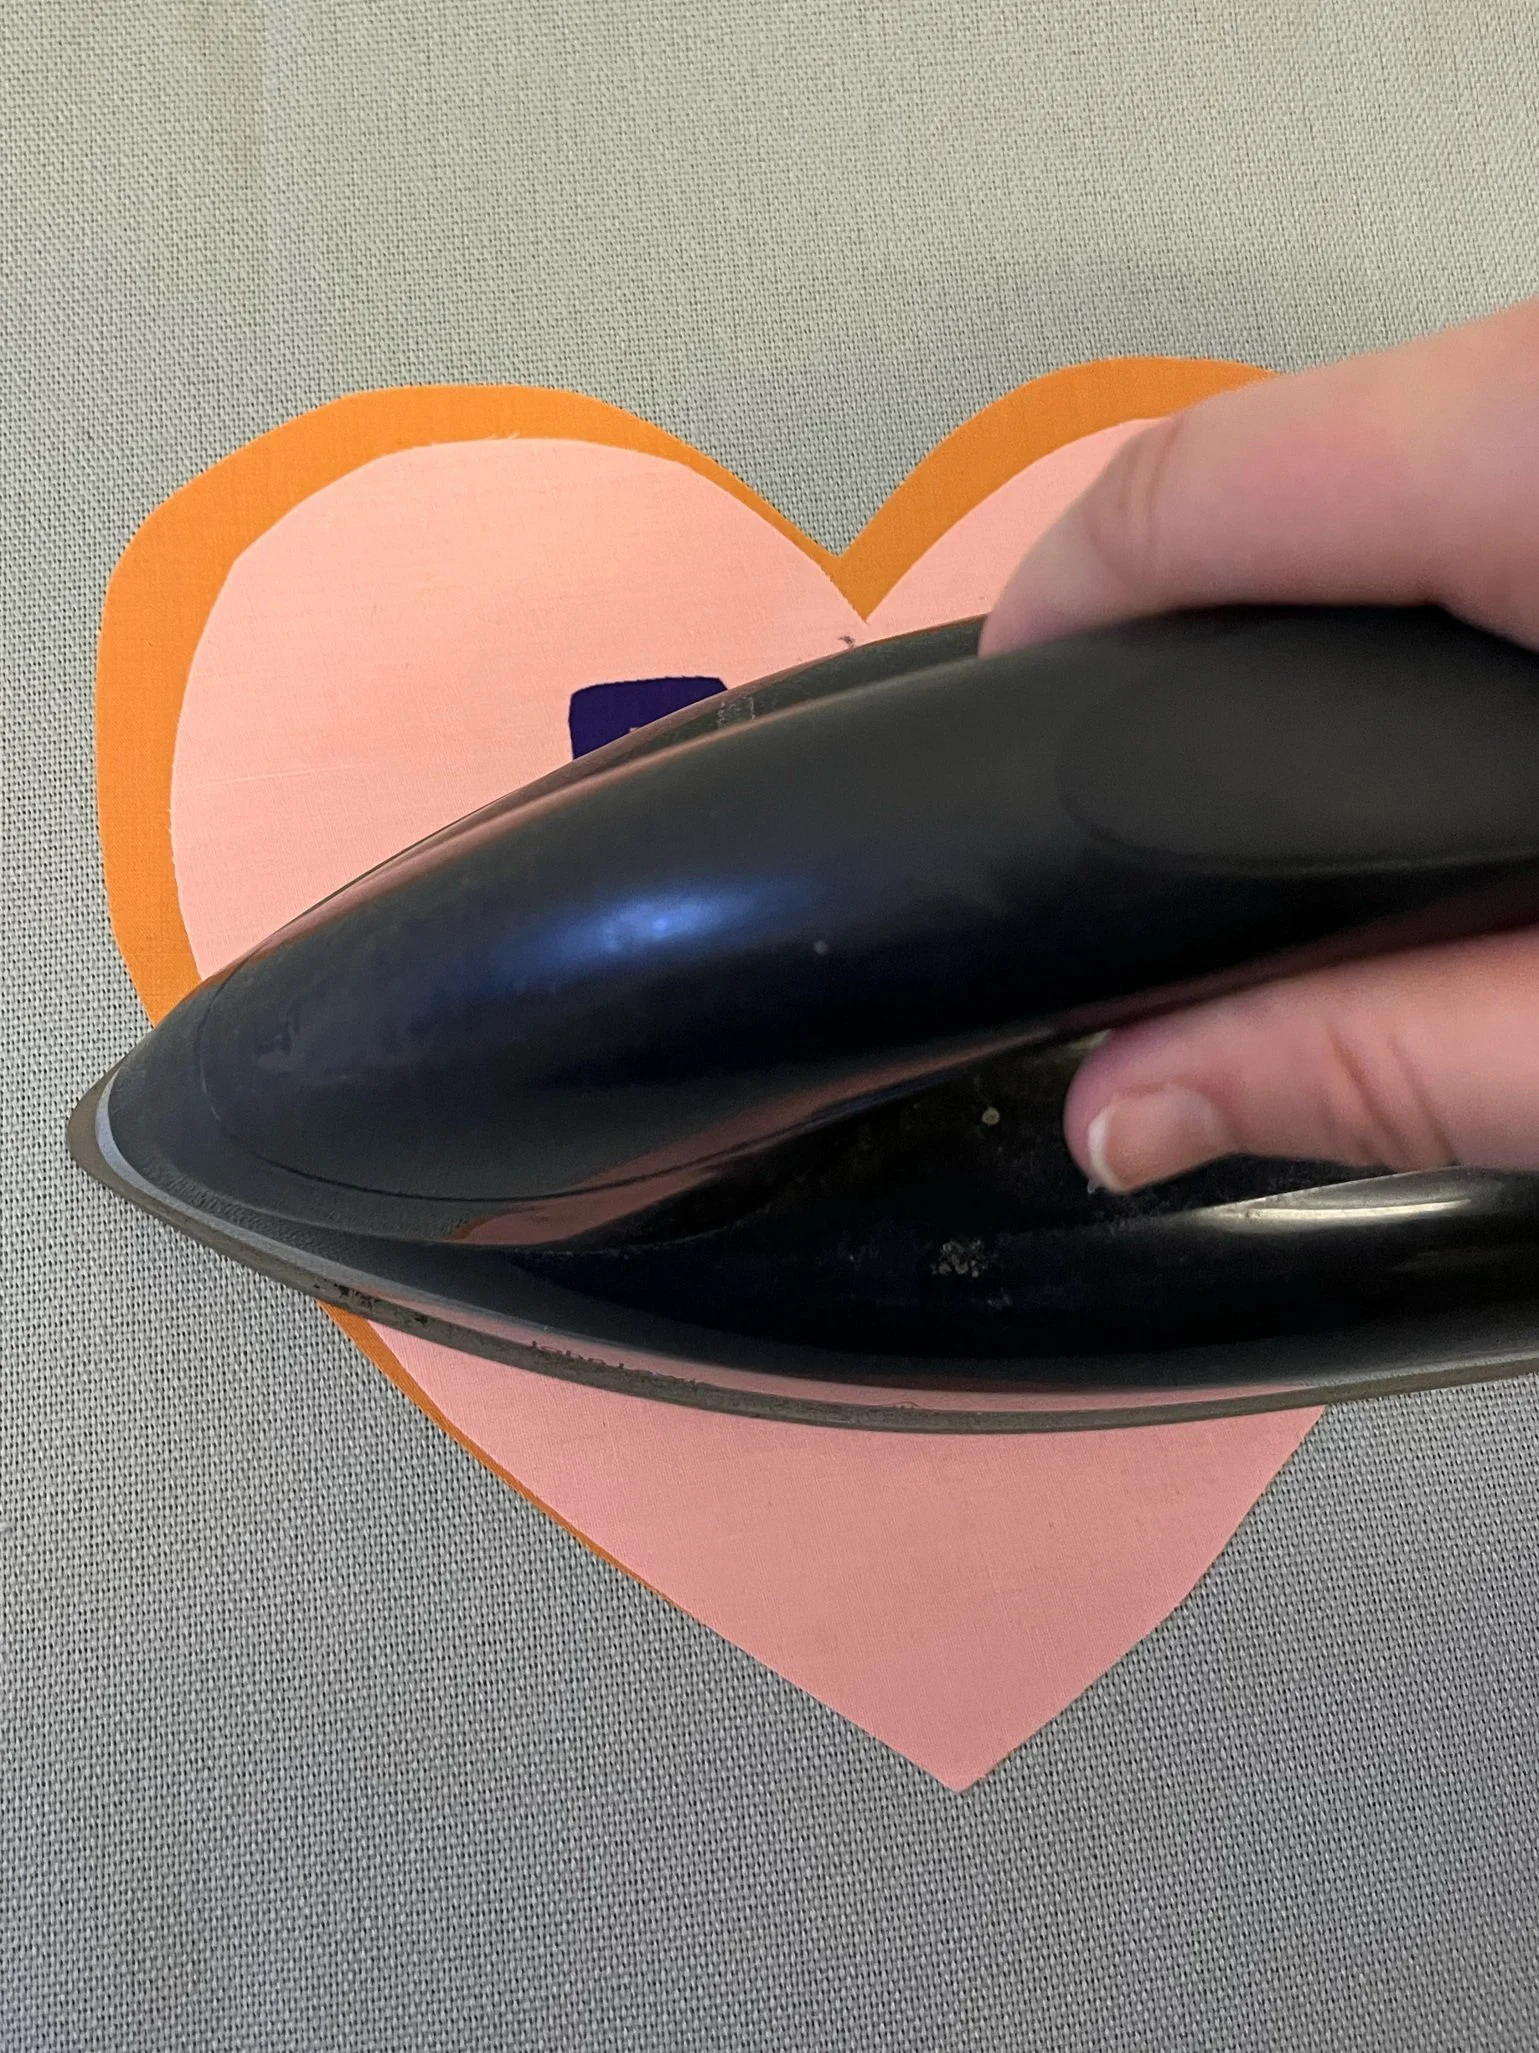
10. Carefully place your iron over the top of the letters, making sure they haven't moved out of place and iron for a few seconds to bond the letters to the hearts.
11. You now have your main design transferred to the cushion cover! Just check that there are no loose areas and just go over with the iron again if there is. If you're struggling with it bonding at all, put your iron on a slightly higher setting. If any 'peel' away over time, simply iron again to bond back together. Now it's time to add some finishing touches!
Pom Poms & Tassels
Now you have finished your cushion cover, you can move on to creating Pom Poms or Tassels for the corners. You don’t need to do this final step, but I think they look great on the corners. You can do a Pom Pom or a Tassel or a mixture of both!
Pom Poms
If you don’t already have a Pom Pom maker, please refer to this handy YouTube video here where you can make one using the cardboard from your kit box, from home or the cardboard your yarn is attached to.
Tassels
There is also a YouTube video by the same company here showing you how to create a tassel. I would advise you make these slightly larger as she suggested by using your cardboard and just use your wool instead of the twine as you’re going to sew it onto the corner of the cushion.
Sewing them on
Take your needle and thread which is bundles together on a piece of cardboard.
Decide where exactly you would like to place them, making sure they are on the ‘right’ side of the cushion. If you have pins at home, you could always pin them in place.
Take a length of thread about 30cm long and tie a knot about an inch from the end.
Starting from the inside of the cushion cover, stitch through and back several times to hold your Pom Pom/ tassel in place.
Tie another knot at the end when you have finished or tie to the lose thread of the knot you made originally to secure both ends together.
Repeat for each of the 4 corners.
Once finished, place your cushion cover over the top of your cushion and enjoy your new love hearts cushion!
If you have any questions about anything at all, please just email me at info@makedoandtrend.co.uk and I will get back to you ASAP!